Showing posts with label MY ORIGINAL RECIPE. Show all posts

Monday, December 3, 2012

CROCKPOT PICNIC BEANS

These beans are slightly sweet and smokey, not to mention VERY flavorful and an inexpensive (and nutritious) way to feed a crowd. The trick is to start them the day ahead, then let them cook in the crockpot all day (or overnight). Your kitchen will smell heavenly.

CROCKPOT PICNIC BEANS

  • 3 cups DRY navy beans  (soaked overnight)
  • 3/4 cup tomato puree
  • 3/4 cut ketchup
  • 2½ cups (bean) water   (see note)
  • 1/4 cup molasses
  • 1/2 cup brown sugar
  • 2 teaspoons DRY mustard powder
  • 1 medium onion chopped
  • 3 teaspoons salt
  • 1/2 pound of bacon (fried and crumbled)

Rinse and sort the dry beans (sometimes, there are tiny rocks or pieces of dirt in the bag). Cover them with water (about 3" above the beans) and put them in the fridge for about 8 hours or overnight.  Drain and rinse them again.

Put the beans in a large kettle and cover with with enough water to measure  3-4 inches above the beans. Gently boil  for 1 to 2 hours (all beans cook at different rates, so just test for doneness after an hour ...just don't let them get mushy). If you want to skip this step, see alternative method below.
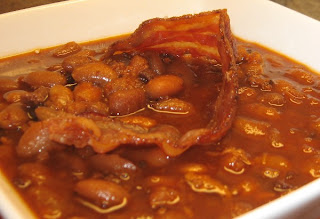
Drain  the beans, but reserve 2½ cups of the bean water. Put the drained beans, onion and crumbled bacon in the crockpot. 

Mix the 2½ cups of bean water with the tomato puree, ketchup, molasses, sugar, dry mustard, and salt until smooth then pour over the beans, stirring very gently to distribute everything.

Cover and cook on low setting of your crockpot for about 8 hours. Don't be afraid to add a little water towards the end if it looks like it needs it (it won't effect the taste).

NOTE: If you don't want to mess with boiling the beans, you can soak them all day and then before you go to bed, put the beans in the crockpot, cover them with water (water only) and let them cook on low all night.   In the morning, drain the beans (saving 2½ cups of the bean water) and then  proceed with the rest of the recipe.

NOTE: Navy beans work the best for this recipe, but northern beans or any small white DRY bean will work, just don't use a dry lima bean...they get mushy too fast.

NOTE:  "Bean water" is simply the water that you boiled the beans in.

BRIGHT SUMMER SALAD

Measurements given here are approximate (except for the dressing). YOU decide how much of each ingredient you would like in your salad. The amounts given here are catered to MY taste buds. 

BRIGHT SUMMER SALAD
  • 3 small heads of broccoli (broken into small pieces)
  • 1 red bell pepper (diced finely)
  • 1 cup raisins
  • 2 oranges (peeled and sliced thickly)
  • 15 ounce can of black beans (rinsed and drained)
  • 1/2 cup  toasted sunflower seeds
  • 1/2 cup sliced green onion tops

Dressing:
  • 1/2 cup light mayonnaise
  • 2 tablespoons fresh lemon juice
  • 2 tablespoons sugar
  • 1/4 teaspoon black pepper


Wash (and shake dry) the broccoli. Remove as much of the stalk and stems as you can so you can break the florets into bite size pieces. Add diced red bell pepper, raisins, oranges, black beans, sunflower seeds and green onions.

Mix dressing ingredients with a whisk and pour dressing over the salad. Toss gently and serve immediately. NOTE: You may not need or want all of the dressing.


NOTE: Peel the oranges, removing as much of the white as you can, then slice the orange into thick slices; cut the thick slices into four wedges.

NOTE: Let your imagination go wild with this salad, you can add just about anything that strikes your fancy.

QUICK and EASY STICKY CHICKEN WINGS

2 pounds of chicken wing sections
½ cup soy sauce
½ cup brown sugar
½ teaspoon black pepper
pinch of red pepper flakes (optional)
20 ounce can of pineapple chunks (drained well)

Cut the wings into sections, discarding the wing tip (or buy already cut up party wings) and place in a 9" x 13" (greased) baking dish.  Mix everything else together and spoon over the wings.

Bake in a 350 oven (uncovered) for 1½ hours, turning everything over every 30 minutes or so. Now I know that seems like a LONG time for chicken wings, but trust me, it does takes that long for the wings to "break down" and be super tender, sweet and juicy and sticky!!

Remove the wings and pineapple from the sauce and serve  (discard the sauce). Hubby likes the pineapple chunks, but I don't care for them...your choice.

NOTE: Do not omit the pineapple, the flavor and moisture content of the fruit is important to the cooking process.

NOTE:  The last 30 minutes of bake time, the chicken wings will get shiney and sticky!!

NOTE: If you are still in doubt about the 1½ hour cooking time, click on the above photo and you will get a better look at the wings themselves and you will see they are juicy and not overcooked.

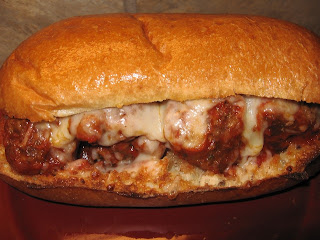
BEST MEATBALL SANDWICH EVER !!

This recipe will feel a crowd, so if you are just feeding the family, cut it in half. Better yet, make the whole recipe and mix the leftovers (the next day) with pasta and parmesan!! I love "day two" recipes.

MEATBALLS
  • 2 pounds of lean ground beef (90% lean)
  • 1 cup dry breadcrumbs (toasted under broiler)
  • 4 tablespoons fresh parsley (minced)
  • 2 cloves minced garlic
  • 1 cup chopped onion sautéed
  • 2 eggs
  • 2 teaspoons salt
  • ½ teaspoon black pepper

Sauté chopped onion and garlic until the onions have mellowed and become a little sweet. Mix them in with all of the other meatball ingredients. Form into 2” meatballs and place on a cookie sheet (that has a rim) and bake at 350° for 15 minutes. Remove from oven and drain. Set aside.

SAUCE

Even if you cut the meatball ingredients in half...do not cut the sauce in half. You can make this sauce on the range or in the crockpot.

In large deep pan, sauté ½ cup chopped onions and 1 clove garlic until the onions are translucent, and then add

  • (1) 15 ounce can of tomato sauce
  • (1) 12 ounce can of tomato paste
  • 4 cups of water
  • 1 teaspoon of dry oregano
  • 1 teaspoon of dry basil
  • 1 teaspoon of salt
  • 1 tablespoon of sugar
  • ½ teaspoon of black pepper
  • ½ teaspoon of fennel seed
  • ¼ teaspoon of dry red pepper flakes

Bring to a boil and stir to thoroughly mix everything. Reduce heat to a simmer and put meatballs in the sauce. Simmer for 2 hours (or see crock pot directions below).

TO SERVE: split your bread roll and put just a skim of butter on the cut side and toast it (for just a minute or so) under the broiler. Remove and load with meatballs and mozzarella cheese and put back under the broiler to melt the cheese. Enjoy!!

CROCKPOT DIRECTIONS

The recipe ingredients are the same, except use 4 cups of hot water and cook on HIGH for 5 hours. Lay a dish towel over the crockpot lid (to insulate it a little, so it will come to a simmer quicker). Once it comes to a simmer, remove the towel and crack the lid open just a bit so that the sauce will reduce a little.

NOTE: The secret to this recipe is the length of cooking time. The meatballs taste AND texture will be SO MUCH better if you cook for the full amount of time, that's why the crock pot is the perfect method to make these sandwiches.

Monday, May 21, 2012

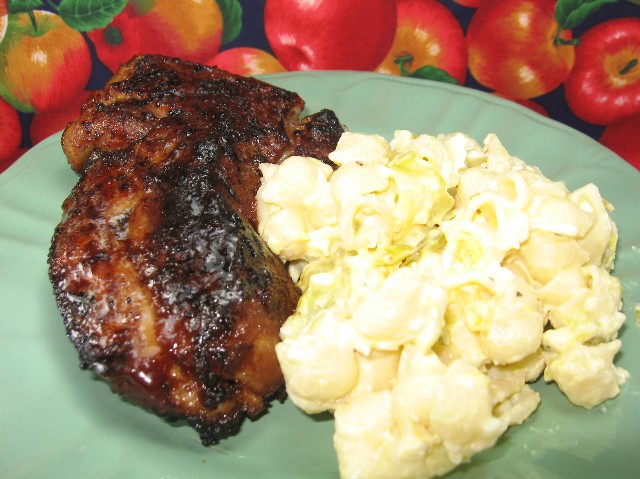
MARINATED PORK LOIN

After grilling the same country style pork ribs  for the past umpteen years, I wanted a change.  I wanted to find some cut of pork that didn't need pre-cooking (in order to get it nice and tender). So recently, we started grilling pork loin (not tenderloin). The whole loin is very tender, flavorful and unlike the country style pork ribs that have lots of ... what picky-picky husband calls "waste" (fat, gristle, bone), the loins have ZERO "waste".  I usually buy a 2 pound loin and that is perfect for three big eaters (or 2 of us plus lunch tomorrow).

1/2 cup soy sauce
1/2 cup brown sugar
4 tablespoons pineapple juice
1 tablespoon dehydrated onion flakes
4 tablespoons canola oil
1/2 teaspoon ground ginger
1/2 teaspoon black pepper

Put everything in a large zip lock plastic bag and squeeze it around to mix well.

Slice your 2 pound pork loin into 3/4" thick slices and put them into the bag with the marinade, making sure the liquid reaches all of the meat surfaces.  Put the bag in the fridge for 6-12 hours (I did it for 6 hours and it was perfect).

When you are ready to grill, remove the meat from the marinade (but save the marinade). Bring the marinade to a very gentle boil and cook it for 15 minutes. This cooking time will make the marinade safe to eat AND it will thicken the marinade so you can use it to baste the pork loin on the grill.

Grill your pork outdoors, basting the meat each time you flip it over.

Wednesday, May 16, 2012

MACARONI SALAD and DRY RUB BLEND

Everyone seems to have their own tried and true family macaroni or potato salad recipe. Some have lots of vinegar, some have lots of mustard, some have no eggs (yee gads!!) I even had some that had small cubes of sharp Cheddar cheese which was surprisingly tasty.

I remember when I was little, my folks took us back to visit our VERY German relatives in the Dakota's and one of my Aunts gave me some German potato salad. I was a huge fan of potato salad, but let me tell you that hers was not like any other potato salad I had ever tasted. It was not only FULL of vinegar and bacon grease, but it was HOT!! It's been over 50 years but I still can remember my shock!!  lol

What do you put in YOUR macaroni (potato) salad?


2 cups dry small seashell macaroni
½ cup chopped onion chopped (fairly fine)
3 stalks of celery with leaves chopped (fairly fine)
½ cup red bell pepper chopped (optional)
1 cup grated carrot
3 large pickles chopped (favorite flavor)
4 hard-boiled eggs chopped
½ teaspoon black pepper
1 cup lite mayonnaise
3 tablespoons yellow prepared mustard
3 tablespoons pickle juice

Boil macaroni for 8 minutes (or as recommended on box), then rinse under cold water, and drain very well.

NOTE: Many recipes warn you not to rinse cooked macaroni, however, I find that macaroni salad stays creamier if you rinse the starch off of the cooked macaroni before you add the mayonnaise to the salad.

Add chopped veggies, eggs and pickles to the cooked and rinsed macaroni. Whisk the mayonnaise, mustard, pepper and pickle juice together and gently stir into the macaroni-veggies.

IMPORTANT: This salad really needs to sit in the refrigerator overnight so the flavors can blend together…it makes a huge difference.

NOTE: I do not add salt to this salad because there is already a lot of salt in the pickles, pickle juice and mustard.

NOTE: Just before I put this salad into the fridge, for the first time, I put a piece of wax paper (or plastic wrap) on the surface of the salad and then I lay 2 paper towels (folded) on top of the wax paper and snap the Tupperware lid on. The paper towel will attract any condensation in the bowl and the waxed paper (or plastic wrap) will keep the moisture from running down into the salad. Once the salad is in the fridge overnight, discard the wax paper and paper towel.

NOTE: The amount of mayonnaise you use is up to you. Start with 1 cup and add more if you like your salad creamier.

If you are looking for a new dry rub recipe, I hope you will try this one. At first glance it may look like it is too sweet, but the final taste is just excellent.

It's great for pork and chicken, just mix it up and rub it onto your raw meat about 20 minutes before grilling...Yummmm!!!

3/4 cup white sugar
3/4 cup brown sugar
1/4 cup salt
1 teaspoon onion powder (not onion salt)
2 Tablespoons coarse ground pepper (I used 1 tablespoon)
pinch of cayenne pepper (or to taste)
2 tablespoons paprika

Mix well and keep in jar with a tight lid.

Monday, April 23, 2012

VEGGIE SIDE SALAD

We still have a lot of snow around the edges of the yard (several feet of it as a matter of fact), but it won't be long before it's barbecue season again, so my thoughts are turning towards side dishes that can be prepared ahead of time. 

Summer Pea Salad, jazzed up with crisp bacon and tomatoes is one of my favorites. It is one of those great salads that travels well and tastes even better after it has been in the fridge for a day or two. If you are going to make this salad, in advance, don't add the crisp bacon right away (it will get soggy), just sprinkle it over the salad before serving.
16 ounce bag of frozen green peas
1/3 cup finely chopped red onion
1/2 cup grated carrot
1/2 cup celery chopped
1 cup thinly sliced mushrooms
1/2 cup red bell pepper chopped
3 slices of crisp bacon cut up
1/2 cup sharp cheddar cheese shredded (I use more)
cherry tomatoes, cut in half
sunflower seeds

Fresh green peas are the best in this salad, but when they are not available, frozen peas work very well too.  Microwave peas (covered) with 1 tablespoon of water for about 3 minutes or until slightly cooked (but not soft) then drain and cool.

In a large bowl, mix all of the above ingredients together (except the cherry tomatoes); gently fold in the dressing.


Dressing
3 heaping tablespoons of light mayonnaise
1 tablespoon freshly squeezed lemon juice
2 teaspoons sugar
1/2 teaspoon black pepper
1-2 tablespoons milk
Whisk the ingredients together and gently fold into salad.


Add cherry tomatoes and an extra sprinkle of cheese to the top of the salad for decoration. Cover and chill.
NOTE: Every microwave cooks at a different rate, so keep an eye on your peas when you microwave them. You don't want them to get overcooked and mushy.

Sunday, March 25, 2012

CHICKEN SOUP FOR A SICK HOUSE

I haven't posted much lately because picky-picky husband and I have had the flu. Not just your every day "better in a week flu", but the old fashioned (don't even get out of your jammies) flu that has plagued us with lethargy and coughs for almost a month.

Our meals have been simple and mostly from the crock pot (or frozen food entree aisle) but then we haven't had much of an appetite either. Now that we are feeling a little better, I am venturing back into the kitchen.

This chicken soup has been a life saver for us during this time. I just keep it going in the slow cooker, adding a little more broth and veggies when necessary. It is a super simple recipe and if your family is coping with this ugly flu, like we are, I hope you will give this magic "elixer" a try.


6 large boneless-skinless chicken thighs (dark meat has the best flavor)
1 cup chopped onion (I like to use sweet onions)
1 cup chopped celery
1 cup chopped carrot
2 quarts of good chicken stock (I use the boxed kind)
1 tablespoon chicken bullion granules
1/2 teaspoon black pepper
1 teaspoon salt
pinch of dried thyme
pinch of poultry seasoning
2 cups favorite veggies (I use frozen mixed veggies)
spaghetti or fettuccine noodles (they hold up better than other noodles)

Cube and brown the chicken thighs in a tablespoon of oil until you get brown crusty spots on the chicken. Remove from pan and put it into the crock pot. In the same pan, saute the onion, celery and carrot until they get a little soft. Use a spatula and use the moisture in the veggies to de-glaze any crusty bits left in the bottom of the pan. Add this mixture into the crock pot ; those crusty brown bits in the pan are PACKED with chicken flavor.

Add the broth, 2 cups favorite veggies, bullion granules and salt and pepper. Stir and cook on high for about 6 hours, stirring once in a while. Half an hour before you serve this soup, break the noodles into 4" pieces and put into hot broth and stir. The noodles should be ready to eat in about 30 minutes.

NOTE: I have tried many different kinds of noodles in this soup. Spaghetti seems to hold up the best without turning to mush if you are cooking the soup for a long time or overnight. I also use rice instead of noodles, however, DO NOT put the rice into the soup (after a while, it will deteriorate and make your soup a mushy mess). Instead, make the rice separately and put a big spoon of it in your soup bowl and ladle the soup over the rice.

NOTE: Any cut of chicken will work in the soup, however, the dark meat gives the most flavor and after 6 hours, it will still be very moist and "fall apart" tender.


NOTE: Any kind of veggies can be used for the "favorite veggies" part. Just make sure you use veggies that will stand up to long cooking. I usually use a frozen veggie mixture that has peas, corn, green beans and carrots, but anything will work (just don't used canned veggies).

NOTE: Homemade chicken broth is best, but I never seem to have any when I want to make this soup, so I use a good quality BOXED chicken broth (just don't use bullion and water to make broth).

Thursday, March 1, 2012

PEANUT BUTTER PUDDING

Last week I got a weird idea for peanut butter pudding; the process was a lot more complicated than I thought it was going to be. I tried several Internet recipes and none of them were exactly what I was looking for. Picky-picky husband was my Guinea pig taste tester and the first spoon full of each new recipe elicited those serious "brow furrows" that make all cooks cringe.

I didn't let that slow me down in my quest for a great "kid pudding". My next move was to start combining and tweaking recipes... the richness from this one ...the consistency from that one ... the sweet-factor from another one. The final result brought a "pudding face smile" to old Picky-picky AND the grand kids. This one IS a keeper!!!

I layered this recipe with sliced bananas and Hershey chocolate syrup, but next time I think I'll try layering it with crushed chocolate wafers ... Yummm!!!


This pudding is rich, creamy, peanut butter-y and oh so easy to make!!

2/3 cup dark brown sugar (light brown is OK, but dark brown is better)
2 level tablespoons of corn starch
1/8 teaspoon salt
1¾ cups whole milk (I've used 2% in a pinch)
1/2 cup heavy whipping cream
1/2 cup creamy peanut butter
1 teaspoon vanilla extract

In a saucepan that has a heavy bottom, whisk together the brown sugar, corn starch and salt. This step helps the cornstarch from clumping-lumping when you add the liquid.

After the sugar, cornstarch and salt are whisked together, slowly add the milk and cream. Stir to make sure everything is mixed well.

Bring to a boil, over medium high heat, stirring constantly. When this mixture gets nice and thick, add the peanut butter and whisk until it is totally melted and pudding just starts to boil again, (takes about 30 more seconds). Remove from heat and add vanilla extract, mix well.

Pour into a pretty serving dish (or individual dishes) and lay plastic wrap directly on top of the hot pudding (make sure the plastic is actually touching the pudding) so a "skin" doesn't form on the pudding as it cools.  Chill for 2-3 hours or overnight.
What a great recipe for ANY kids birthday party!!

Monday, February 6, 2012

BEEF TOMATO-BARLEY SOUP

"It has finally stopped snowing", she said quietly as she knocked on wood. We actually saw the sun today and they are calling for more sun tomorrow; it has been quite a winter!! My poor old crock pot has hardly hit the shelf this winter; it seems like there is always some bean or soup recipe bubbling away in there.

Today's post is one of picky-picky husbands crockpot favorites. It is very rich, very beefy, very filling and it just keeps getting better and better the longer it cooks.


I was a young bride when I tried to make  home made beef soup the first time and it was terrible (I think it called for a ton of bay leaves). I remember cooking it all day and wanting it to taste as good as it looked, but we just couldn't eat it.

I didn't give up though, I tried all kinds of magazine recipes; some had a ton of herbs; some had onion soup mix; some had Italian salad dressing mix in it; I tried them all, with little success. I decided to go back to a no frill vegetable soup recipe.  I tweaked it for years until it evolved into the recipe I'm posting today. Picky-picky husband is crazy about this soup and loves to dip hot buttered bread rolls into it.

2 pounds beef chuck roast
1 cup onion chopped
1 cup celery chopped
2 cups carrot chopped
4 large potatoes cubed
2/3 cup pearl barley (don’t leave out)(2) 32 ounce boxes beef broth
(1) 15 ounce can tomato sauce
½ teaspoon black pepper
(2) heaping teaspoons beef bullion granules

Cut the beef into 1” cubes, removing as much fat as possible. Brown beef in a minimal amount of vegetable oil until beef is nice and crusty brown (this is where the majority of your soup flavor will come from, so don't skip this step).
.
Remove beef from fry pan and drain off as much fat as you can; add onion, celery and carrots. Using the moisture from the veggies, de-glaze any crusty brown bits on the bottom of the pan. If the brown bits are stubborn, add a table spoon of water and use your spatula to scrape up the fond . Cook until onions are transparent.
.
Put the beef and sauteed vegetables in the crockpot and add the rest of the ingredients, stir well. Cook on low for 8 hours.
.
NOTE: Do not leave out barley. It not only gives a wonderful flavor to the soup, but it thickens the broth.

NOTE: Put any vegetables you like in the soup, just make sure they are vegetables that can stand up to long cooking times.

NOTE: Taste the soup for salt when it is almost done cooking.

Friday, January 27, 2012

CROCKPOT CHICKEN CHILI

This is a new recipe experiment for us and I must tell you it was delightful. It is one of those rare meals that is not only good for you, but it's very tasty, very hearty and it rings all the familiar bells of comfort food.

This recipe is also a breeze to make because you put most of the ingredients in the crockpot the night BEFORE you want to serve it (no need to pre-soak the beans) and then in the morning, you just add the chicken and carrots and let it cook all day!! It will make your house smell fantastic!!

1½ cups DRY Great Northern white beans (rinsed)
4 boneless skinless chicken breasts
1 cup chopped onion (sauteed)
4 ounce can mild green chile's
2 cups grated carrots
3 teaspoons chili powder
1 teaspoon ground cumin
½ teaspoon dry oregano leaves
1/8 teaspoon cayenne pepper (or to taste)
1 teaspoon salt  (see note below)
½ teaspoon black pepper
6 cups chicken stock (see note below)
1 cup Monterrey Jack Cheese shredded

Wash and sort the dry beans (do not pre-soak) and put them in the crockpot. Add the stock, sauteed onion, seasonings and chile's. Cook on LOW setting overnight (or about 8 hours).

In the morning, remove about a cup of the beans and mash them thoroughly. (I put them in the blender)  Return the mashed beans to the crockpot; this will thicken up the broth in the chili.

Cut the raw chicken into large pieces and add it to the crockpot along with the shredded carrots.  Cook this on high for 6 to 8 hours. If your crockpot runs very hot (as some of them do) cook it on low instead.

About 30 minutes before you want to serve the chicken chili, add the shredded Monterrey Jack cheese and stir.
I hope you like this hearty "good for you" chili as much as we did.

NOTE: If you use salt free chicken broth, go ahead and put the teaspoon of salt into the chili. Taste it again after it is finished cooking (and you've added the cheese) to see if it still needs more salt.   If you use chicken broth made from bullion, I wouldn't add any salt to the recipe, as the bullion broth is already quite salty.

NOTE: I hope you don't leave out the grated carrot, it really adds a wonderful taste and texture to the chili.

NOTE: We are fairly timid when it comes to spicy heat in our food. The recipe calls for 1/8 teaspoon of cayenne pepper. I used a scant 1/8 teaspoon and it was absolutely perfect for us. If you like more heat in your food, add more cayenne.

Wednesday, January 11, 2012

SPAGHETTI

On snowy winter days, when it is good to stay close to home, I enjoy making dinner in the slow cooker. One of our favorite's is spaghetti; our kids were raised on this recipe and it is one of picky-picky husbands favorites.

The thick and hearty sauce and tender meatballs really need a solid six hours or more in the slow cooker, so don't be tempted to rush this recipe. I love the way my kitchen smells when I make this sauce.


MEATBALLS
1 pound of lean (90% or better) ground beef
1/2 cup fine dry bread crumbs
1 egg
1 teaspoon salt
1/4 teaspoon black pepper
Mix all of the meatball ingredients and shape into walnut size meatballs. Bake in a 350 oven for 15 minutes then drain well before adding to sauce.

 
SPAGHETTI SAUCE
(1) 14 ounce can of tomato sauce
(1) 12 ounce can of tomato paste
4 cups water
1/2 cup chopped onion
1 cup finely diced carrot
1 clove of minced garlic
1 tablespoon olive oil
2 teaspoons dried sweet basil
1 teaspoon dried oregano
1/2 teaspoon fennel seed
1 teaspoon salt
1/2 teaspoon black pepper
1 tablespoon sugar

Saute the onions, garlic and carrots in the olive oil until they are very aromatic (they don't need to be cooked through). Add the rest of the sauce ingredients and bring to a boil.  Put EVERYTHING in the slow cooker and add the baked meatballs. Cook on high for 6 hours.

The last couple of hours, leave the slow cooker lid open just a crack so the sauce will reduce and thicken. Serve over spaghetti noodles.

NOTE: If you like mushrooms, add them the last hour of cooking.


NOTE: No matter how hard I try to make a "smaller" batch of spaghetti sauce, it always ends up making too much, so now I plan on it. The sauce that we don't use on night one, goes into a lasagna casserole for the freezer. Some sauces just need to be cooked in big batches I guess.

Tuesday, November 15, 2011

CLASSIC FRENCH TOAST

Today is our 41st Wedding Anniversary. My picky-picky hubby and I have actually been together for 46 years (we were high school sweethearts) and we are more in love today than ever!!
~~~~~~~
This is a recipe for basic french toast. Everyone seems to have their own recipe and there are a million variations, but this is a post for the beginning cook, complete with a few tips I've learned over the years.

First of all, a tip about the kind of bread you need. ANY bread will work, but SOME breads make a much better french toast than others. Fresh, soft bread makes the worst french toast; day old (or even week old) bread works better. Thicker bread makes better french toast than thinner bread. Sweet bread like Texas toast works well, as do semi-stale cinnamon rolls (sliced)  and of course raisin bread, (so keep an open mind when thinking about bread choices)!!
4 large eggs
2 tablespoons heavy cream
1 teaspoon vanilla
¼ teaspoon cinnamon
dash nutmeg

Whisk all of the above until very well mixed.  I like to use my immersion blender to do this.  Dip the bread into the mixture and let it sit for 10 or 15 seconds then lift out and cook on preheated (and buttered) frying pan (I get the best results from my electric frying pan). Cook until the french toast is golden brown on both sides.

Serve immediately with butter and HOT maple syrup.

NOTE: You can use milk instead of cream, but the cream gives a richer taste and helps the french toast get that golden "crust".

Thursday, September 8, 2011

UPSCALE SLOPPY JOES

Upscale Sloppy Joes sort of sounds like a contradiction, doesn't it? I am here to tell you that this recipe is definitely good enough for company (at least MY kind of company, lol).  It is made  with a chuck roast in the slow cooker, so what could be simpler? 
The beef chuck roast juices combine with the Sloppy Joe seasonings while it cooks and the result is fork tender beef and an absolutely delicious gravy/sauce. I only had bargain hamburger buns for this photo, but I can see this same recipe served on crusty sourdough rolls along with some potato salad that would please any guest.

UPSCALE SLOPPY JOES
2 pounds lean beef chuck roast (trim any large fatty areas)
1 cup chopped onion
2/3 cup chopped celery
2/3 cup green pepper
2/3 cup ketchup
½ cup water
2 tablespoons Worcestershire sauce
¼ teaspoon red pepper sauce
1½ teaspoons salt
½ teaspoon black pepper
1 teaspoon mustard powder

Brown the beef chuck roast in a frying pan, then place in a slow cooker. In the same frying pan, saute the vegetables until the onions are almost transparent.  Put the vegetables in the slow cooker.

In a bowl, mix the rest of the ingredients and pour over the meat and veggies. Cook on high for 4 to 5 hours or on low for 8 hours. It isn't necessary, but I turn the meat over a couple of times during cooking and spoon the sauce over the meat.

Thirty minutes (or so) before serving, thicken the sauce with a slurry of 1 tablespoon cornstarch and 1 tablespoon of water.  Cut the beef into sandwich slices (or just pull it apart) and top with some of the
sauce.  OH SO GOOD!!

NOTE: This would even be delicious over rice.
NOTE:  My slow cooker took only 4 hours on high to make the meat extremely tender, but still slice-able. If you like your beef more like pulled pork, cook it on high for 5 hours.

Wednesday, August 3, 2011

CRISP BACON and GUACAMOLE SANDWICH


I first posted this idea a couple of years ago and then promptly forgot about it. However, summer is often too busy (or hot) to cook, so recently I dug into my files for a good sandwich idea and re-discovered this treat.

You will not find this delight on any health food menu and you won't find it on your weight watchers plan, but man oh man, is it tasty. Crisp fried bacon, on top of a thick layer of guacamole and topped with lettuce and tomatoes. You just have to say yes to a good sandwich some times!

The guacamole for these sandwiches is excellent:
3 avocados
juice of 1 lime
1 teaspoon salt
½ cup sweet (or red) onion diced small
3 tablespoons chopped fresh cilantro
2 Roma tomatoes diced small
1 teaspoon minced garlic
pinch of ground cayenne pepper (optional)

Mash the avocado with the lime and salt and then stir in the rest of the ingredients. You can use this right away, but the flavors blend better if it sits in the fridge for an hour or so.

Spread a nice thick layer of guacamole on your toasted bread, then top with crisp bacon, tomato slices and favorite lettuce.  Eat your sandwich in the shade with a tall glass of sweet ice tea !!

Tuesday, June 21, 2011

CROCKPOT LASAGNA

SERIOUS COMFORT FOOD

I guess this isn't technically lasagna, since it is cooked in the crock pot and uses rigatoni noodles, but it qualifies as serious comfort food and has all of the rich, familiar lasagna flavors.

1½ pounds lean ground beef (browned & drained well)
4 cups of beef broth (not bullion)
(1) 15 ounce can of tomato sauce
(1) 12 ounce can of tomato paste
1 tablespoon dehydrated onion flakes
1 teaspoon dry oregano
2 teaspoons dry basil
½ teaspoon fennel seed (don't leave out)
2 teaspoons salt
1 tablespoons sugar (don't leave out)
½ teaspoon black pepper
small pinch of red chili flakes (optional)
¾ pound of rigatoni noodles
½ pound of mushrooms (thick sliced)
2 to 3 cups Colby jack cheese shredded
1 cup of ricotta cheese

Brown the ground beef and drain it very well. In a large crock pot (see note below), Mix the beef broth, tomato sauce, tomato paste, onion and spices. Use a whisk to mix the sauce together well, then stir in the meat and mushrooms. Cook on high for 4 hours (see note). Stir once in a while during the 4 hours if possible (but not absolutely necessary.

After 4 hours, Stir in the DRY unboiled rigatoni, make sure you push them under the sauce (add a little extra hot water if necessary). Add the ricotta to the crock pot by spooning tablespoons of it in random spots and gently push down on the ricotta to submerge it as well (don't stir).

Continue to cook on low for 30 more minutes. Sprinkle the surface with shredded Colby jack cheese and put the lid back on for about 5 minutes or until cheese is nicely melted. Serve.

NOTE: My crock pot is a large oval and wide slow cooker, which works well for this recipe, as opposed to a small/tall one.  The main cooking time is 4 hours on high, but if you are going to be away from the house all day, just turn it down to LOW and cook for 8 hours before you add the noodles. If you are using one of those smaller/taller slow cookers, you may have to adjust the cooking time a little.

NOTE: My crock pot has a "low" setting, a "high" setting and a "warm" setting. Once this recipe is completely done (and ready to eat) you can leave it on "warm" for quite a while. Warning, "low" is not the same as "warm".

NOTE: Noodles tends to fall apart if you leave them in the crock pot for much more than 30 minutes, so don't be tempted to add them early. Thirty minutes is perfect.

NOTE: This recipe uses rigatoni noodles, which are large diameter tubular noodles that have ridges on them. However, any kind of thick walled (sturdy) noodle will work for this recipe. Just make sure you do NOT BOIL THEM before you add them to the sauce. They cook in the sauce and soak up all of that extra liquid. Regular elbow noodles work well if you are serving this to a crowd of kids.

NOTE: I like dehydrated onion in this recipe, but if you don't have that, just saute a small chopped onion along with the ground beef.

NOTE: You can use your favorite cheese. We happen to like Colby jack cheese, but mozzarella works well too.

NOTE: This reheats very well.

Monday, April 11, 2011

RED RICE

I am on a never ending search for good side dishes. This is one of my favorite "go to" recipes for seasoned rice. It is FULL of flavor and goes well with just about any choice of meat dish. It is especially handy for a potluck or buffet since it can easily be doubled/tripled and remains tasty at room temperature. We take this with us (already cooked) when we go camping, since it reheats nicely and really "rounds out" those campfire masterpieces Hubby grills. 1 cup raw white rice (not instant rice)
2 tablespoons canola oil
½ cup chopped onion
2 teaspoons chili powder
1 teaspoon ground cumin
½ teaspoon dried oregano
1 teaspoon salt
¼ teaspoon black pepper
15 oz. can diced tomatoes in juice
1 tomato can of water + ½ cup
1 red bell pepper chopped
1 cup red kidney beans

Heat the canola oil, then add the raw rice, onion and spices. Saute this mixture until the onion is transparent and the rice is opaque. Add the red bell pepper, kidney beans, the whole can of diced tomatoes (plus the juice) plus 1 full can of water and another ½ cup of water. Stir well and bring to a boil.

Put a tight fitting lid on the pan and turn the heat down to a slow simmer. Cook for 20 minutes, then turn off heat and let sit for 5 minutes. Fluff with a fork and serve.
NOTE: "Toasting" the spices in the oil/raw rice mixture at the beginning of this recipe really "wakes up" the spices and helps the flavor get deep into the rice.

Thursday, March 31, 2011

MEXICAN PULLED PORK & PINTO BEANS

I love this versatile recipe. First of all it is all done in the crock pot in just a few hours with no need to pre-soak the beans and leftover possibilities are endless.

I make this with a 2 pound pork tenderloin, because it is nice a lean, but any pork roast will work. I have a large oval crock pot that tends to run a little hot, and this recipe is fall apart tender for me in 6 hours on low heat. Depending on your crock pot and the size of pork you use, it could take as many as 8 hours, but that is unlikely (just start checking for tenderness at 6 hours).


2 pounds (roughly) pork tenderloin
1 cup dry pinto beans (no need to soak)
(1) 4 ounce can of mild green chilies
3 teaspoons chili powder
2 teaspoons ground cumin
2 teaspoons salt
1 teaspoon dry oregano
1 clove garlic minced
1 cup chopped sweet onion
healthy pinch of dry red pepper flakes (optional , see note)

Brown the pork well and put it in the crock pot. Saute the onions & garlic in the same pan and then mix them with the dry beans, spices, canned chilies then pour over the meat. Add just enough water to mostly cover the beans & meat, it should look like this:

Make sure the liquid gets under the meat as well. After cooking on low for 4 or 5 hours, check the liquid level in the crock pot and add a little more water if necessary, but not too much. This liquid makes the best red gravy!!

Take the meat out of the crock pot when it gets fork tender (remove any fatty pieces and bones) and pull it apart. Thicken the liquid in the crock pot with a cornstarch and water slurry, then put meat back in with the beans and gravy.

On the first night, I like to serve this over rice or corn chips, cheese avocado & sour cream. On the second night, it makes killer burritos like this:
NOTE: A word about the heat or spice in this recipe. My hubby doesn't like much "heat" in his food. He likes strong flavors, he just doesn't like "fire" as he calls it. I use a very small pinch of dry red pepper flakes when I make this for him. If you like a little more "fire", just up the dry red pepper flake ingredient.


Tuesday, March 1, 2011

SWEET & SOUR PORK RECIPE

There are three reasons to try this great recipe. First, this recipe is made in the slow cooker, so it's super easy. Secondly, this recipe is very cheap to make and thirdly, it gets rave reviews whenever I make it. What more can you ask for?
.
You should know that I am not a big sweet and sour fan, but I love this recipe. It is extremely moist and just the right amount of sweet to sour ratio.

 Walmart sells a small vacuum packed 2 pound pork roast that is perfect for this recipe. The package says "pork loin rib eye pork roast" and even here in Alaska, it's only $4.50!!
.
2-3 pound lean pork roast
1 cup sugar (seems like a lot, but it mellows out)
½ cup white vinegar
4 tablespoons soy sauce
4 tablespoons ketchup
20 ounce can crushed pineapple (drained)
.
Brown the pork roast on all sides and put it in your slow cooker. Mix everything else and bring it to a boil, then pour it over the meat.
.
Cook on low for 4 hours or until very tender (spoon the sauce over the meat every once in a while).
.
That's it...super easy!! At the very end of the cooking time, I thickened the sauce a little with a slurry of cornstarch and water (right in the crockpot). To serve, slice the meat and spoon a little of the sauce over it; it's great with rice.

Now this last suggestion is not for everyone, but my picky-picky hubby absolutely loves it. On day two, I pull this pork apart and mix it with a little of the sauce (make sure you include some pineapple out of the sauce). While its still cold, I roll it into a large burrito size tortilla (folding in all the ends) and then I brown the whole sandwich in a little butter until its piping hot. Hubby is extremely UNdemostrative when it comes to food, but he ooohhh'd and ahhhhhh'd about this sandwich until the last bite.

NOTE: Sorry about these photographs. This is one of those recipes that, no matter how hard to try to get a good photo, it just doesn't work. You'll just have to trust me that it is delicious.

Monday, February 7, 2011

EASY ENCHILADA CASSEROLE

This is a great comfort food classic that I turned into an easy, quick fix casserole. You can easily double or triple the ingredients for a big crowd. The flavors are great and it reheats extremely well.

MEAT FILLING
1 pound lean ground beef
1 teaspoon salt
1 tablespoon dry onion flakes
3 teaspoons chili powder
1 teaspoon ground cumin
½ cup water
Brown the ground beef and drain. Return to pan and add everything else, stir well and let this simmer for about 10 minutes.

After simmering for 10 minutes, add one half can of refried beans and a 4 ounce can of mild green chilies (I use Ortega brand), stir well and set aside.
ENCHILADA SAUCE
(1) 6 ounce can tomato paste
1 teaspoon salt
1 teaspoon chili powder
1 teaspoon ground cumin
2 cups water

Mix well and simmer for about 15 minutes...set aside

ASSEMBLY

In a greased 9 x 13 pan, place two layers of soft corn tortillas; cover with a little of the enchilada sauce. Space large spoons of the meat filling 2" apart on top of the sauce, and sprinkle with a little cheese like this:
Top with TWO more thickness' of soft corn tortillas that have been cut into diamonds, like this: Ladle some more sauce over the soft tortilla diamonds, then repeat with the meat and cheese. Bake in a preheated 350 oven for about 35 minutes. You can make this early in the day and then just pop it into the oven at dinner time. If you do that, add about 10 minutes to the baking time.


Search This Blog

Popular Posts

Like This

 
Copyright © 2011. Area Information: MY ORIGINAL RECIPE . All Rights Reserved
Company Info | Contact Us | Privacy policy | Term of use | Widget | Advertise with Us | Site map
Template modify by Creating Website. Inspired from CBS News