Showing posts with label CONDIMENTS. Show all posts

Monday, December 3, 2012

EASY BUTTERSCOTCH ICE CREAM TOPPING

EASY BUTTERSCOTCH ICE CREAM TOPPING
  • ¼ cup butter
  • 1¼ cups light brown sugar (packed)
  • 16 large marshmallows
  • 2 tablespoons light corn syrup
  • dash of salt
  • 1 cup of evaporated (canned) milk
  • 1 teaspoon vanilla extract
  • 1/2 teaspoon rum extract

Melt the butter in a saucepan over low heat. Stir in the sugar, marshmallows, corn syrup and salt.

Stirring constantly, keep your heat very low until everything is melted and smooth then raise the heat to a medium low setting. Bring to a gentle boil (keep stirring) and boil for 1 minute.

Remove from heat and cool for five minutes. Stir in evaporated milk and extracts, mix until everything is very smooth.


Store in fridge (keeps for a couple weeks if it lasts that long). Tastes great cold or warm.

PAUL PRUDHOMME SEASONING MIX CLONE

PAUL PRUDHOMME (style) SEASONING MIX

  • 1 tablespoon salt
  • 1 tablespoon paprika
  • 1½ teaspoons garlic powder
  • 1 teaspoon onion powder
  • 1 teaspoon white pepper
  • 1 teaspoon DRY mustard powder
  • ½ teaspoon ground cumin
  • ½ teaspoon ground turmeric
  • ¼ teaspoon ground nutmeg

Mix everything (makes about 1/4 cup) and rub, liberally, onto raw meat about an hour before grilling.

ZUCCHINI PICKLE RELISH

12 cups unpeeled zucchini (chopped small)
3 cups sweet onion (chopped small)
1 cup celery (chopped small)
2 large red bell peppers (chopped small)
2 cups peeled carrots (chopped small)
1 cup pickling salt (see important note)
3 cups white vinegar
3 cups granulated sugar
2 teaspoons turmeric
2 teaspoons DRY mustard powder
1 tablespoon celery seed
1/2 teaspoon black pepper
1 tablespoon corn starch


Wash and dry the vegetables before cutting them (the only one you should peel is the carrot).  Coarsely chop the vegetables, then put them in the food processor (2 or 3 cups at a time) and pulse them a few times to get them small enough for a good relish (but not too small). The chop size should look like the next photo.

CLICK ON PHOTO TO ENLARGE
Measure the vegetables AFTER you chop them in the food processor.

Mix the small chopped vegetables and 1 cup of pickling salt. Place this mixture (covered) in fridge overnight (The salt will draw excess moisture out of the veggies).

IMPORTANT NOTE: After the vegetables have chilled overnight, it is VERY IMPORTANT that you rinse the salt off of them.  I used a colander and rinsed the veggies three times (in small batches). Whatever method you choose to rinse the salt off, just make sure you rinse, rinse, rinse then squeeze as much water out of the chopped veggies (with your hands) as you can. Set aside.

In a large, non-aluminum, pot, mix the vinegar, sugar, celery seed, spices and corn starch. Bring to a boil (to dissolve the sugar). Add all of the rinsed vegetables to the pot and bring BACK to a boil. Once it is boiling well, turn heat to medium low and gently boil everything for 20 minutes, stirring every five minutes or so.

While the relish is simmering, sterilize 7 pint jars and 7 (two piece) screw on lids. I do this by putting the jars through a hot cycle in my dishwasher (but I don't put the lids in there). Keep the jars in the (unopened) hot dishwasher after the last cycle.

For the lids, I just wash them with hot soapy water, rinse them well and then pour boiling water over them in a large saucepan which I keep warm on a burner.

Also, while the relish is simmering, bring your  hot water bath to a boil, here's how: Place a rack on the bottom of a large stock pot (or something to keep the jars up off of the bottom of the pan) and fill the pot with water (water should be deep enough to cover the jars by 2". Bring to full boil.

Now that your relish has boiled for 20 minutes, remove it from the heat and place it in the hot jars, leaving 1/4" space at the top of the jars (make sure there are no air pockets in the relish). Wipe the rims of the jars with a clean, hot, wet kitchen towel and screw on the two-piece lids fairly tight. Lower the jars into the already boiling water and keep them in there  10 minutes for half pint jars and 15 minutes for pint jars.

Remove from boiling water and let cool to room temperature on your kitchen counter. As they cool on your counter, you will hear the lids "pop" when they make the correct seal.  If they don't "pop", just keep them in the fridge.

NOTE: Do not use regular table salt for this recipe because the anti-caking agents in table salt cause the relish to discolor.  If you don't have pickling salt, the next best thing to use is kosher salt (but I highly recommend pickling salt).

NOTE: This recipe makes 7 pints of relish.

MAPLE SYRUP

This recipe is SUPER quick and easy:

1 cup water
1 cup granulated sugar
1 cup brown sugar (I use dark brown sugar)
3/4 teaspoon maple flavored extract  (see note)
1/2 teaspoon vanilla extract

Put everything in a large, heavy pan (use a DEEP pan because this syrup will bubble up as it boils).

Boil hard (not stirring) for 3-4 minutes, then remove from heat.   You can use it right away, but it will seem thin.  The syrup thickens as it cools. Use it just like you would any pancake syrup.

We like to eat the syrup warm (not hot).

NOTE: I like to use dark brown sugar, but light brown sugar works just as well (but syrup will be  lighter in color).

NOTE: Bring the ingredients up to a rapid-crazy boil over high heat. The liquid will try to "climb" the walls of the pan, so make sure your pan is big enough. Once it's boiling like crazy (don't stir), turn the heat down to medium high and boil for 3 to 4 minutes. I boil mine for 3 minutes, but if you want the syrup to be a little thicker, go for 4 minutes. If you boil it much longer than that, the syrup will form a few rock candy crystals in the bottom of the jar (fun to eat).

NOTE:  I prefer a maple flavored extract called Mapleine (Walmart carries it), but if you can't find it, regular maple flavored extract works well too. My family says they can't tell the difference.

Monday, May 21, 2012

MARINATED PORK LOIN

After grilling the same country style pork ribs  for the past umpteen years, I wanted a change.  I wanted to find some cut of pork that didn't need pre-cooking (in order to get it nice and tender). So recently, we started grilling pork loin (not tenderloin). The whole loin is very tender, flavorful and unlike the country style pork ribs that have lots of ... what picky-picky husband calls "waste" (fat, gristle, bone), the loins have ZERO "waste".  I usually buy a 2 pound loin and that is perfect for three big eaters (or 2 of us plus lunch tomorrow).

1/2 cup soy sauce
1/2 cup brown sugar
4 tablespoons pineapple juice
1 tablespoon dehydrated onion flakes
4 tablespoons canola oil
1/2 teaspoon ground ginger
1/2 teaspoon black pepper

Put everything in a large zip lock plastic bag and squeeze it around to mix well.

Slice your 2 pound pork loin into 3/4" thick slices and put them into the bag with the marinade, making sure the liquid reaches all of the meat surfaces.  Put the bag in the fridge for 6-12 hours (I did it for 6 hours and it was perfect).

When you are ready to grill, remove the meat from the marinade (but save the marinade). Bring the marinade to a very gentle boil and cook it for 15 minutes. This cooking time will make the marinade safe to eat AND it will thicken the marinade so you can use it to baste the pork loin on the grill.

Grill your pork outdoors, basting the meat each time you flip it over.

Wednesday, May 2, 2012

BAJA SAUCE (Taco Bell Clone)

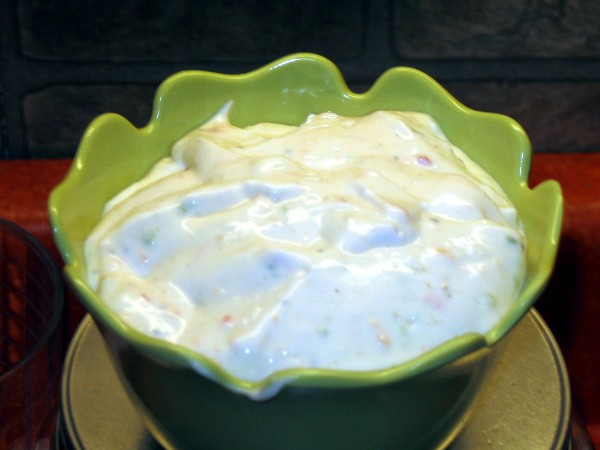
Everyone is posting spicy and delicious recipes for Cinco de Mayo, so I thought I would post one of my favorite "go withs".  This cold, creamy and spicy condiment can be used on anything that you would use sour cream on; it is delicious on beef tacos, enchiladas, fish tacos, veggies and much more. Just make sure you let it sit in the fridge overnight before serving it. We call it Baja Sauce at our house.

¼ of a red bell pepper
1 jalapeno sliced (see note below)
2 tablespoons diced onion
Put the above ingredients in a food processor, and chop until very fine.

Mix 6 teaspoons of the above chopped mixture with:
½ cup mayonnaise
½ cup sour cream
1 tablespoon vinegar
¼ teaspoon black pepper
¼ teaspoon garlic powder
¼ teaspoon ground cumin

Mix well and cover. Chill overnight.
NOTE:  I use a very small jalapeno and remove the seeds and ribs  to lessen the heat factor for picky-picky husband, but if you like more "heat", use a larger pepper or leave some of the seeds  in.

NOTE: I've never tried Miracle Whip in this recipe, so I can't comment on that. I used light mayonnaise and light sour cream and it worked very well.

NOTE: This keeps in the fridge for several days.

Sunday, August 7, 2011

"Peanutella" Chocolate Peanut Butter Spread

I found this fabulous recipe over at Smitten Kitchen, and it was so much fun to make and even more fun to eat. If you like Nutella, you will LOVE peanutella, just think of the possibilities!!

Lets see, let me count the ways to enjoy peanutella: on waffles, on pound cake, on warm scones, in a sandwich, with s'mores, on waffles, as a fruit dip and...oh yes...right out of the jar!!!
2 cups shelled, skinned raw peanuts (see note)
½ cup unsweetened cocoa powder (best quality you can find)
1¼ cups powdered sugar
¼ teaspoon salt (plus a pinch?)
2 to 3 tablespoons peanut oil

Spread the nuts on a cookie sheet and roast in a 400F oven for 10 minutes, stirring half way through for even roasting.  NOTE: I couldn't find raw peanuts, so I used dry roasted UNSALTED peanuts and roasted them for only 5 minutes in the oven (to bring out more flavor).

Put the nuts in a food processor and process for five minutes. At first they will get mushy or pasty, but keep processing and the nuts will start to liquefy. Scrape down the sides of the food processor every once in a while.

Once the nuts begin to liquefy, add the cocoa powder, powdered sugar, salt and 2 tablespoons of peanut oil. Process for another minute or so. If the mixture seems too thick (it will thicken more in the fridge) add the other tablespoon of peanut oil. Taste the mixture, add another pinch of salt if you think it needs it.

That's it!! Store in the fridge (tightly covered) for up to a week.  This mixture might seem a bit thin at first, but it will thicken as it "sets" in the fridge.

Monday, July 25, 2011

BARBECUE SAUCE

We love this barbecue sauce; I can't remember exactly where I found it, but it is a keeper. I usually double this recipe then store it in mason jars in the fridge. It lasts for weeks. It is a thinner sauce than some of the ultra-thick commercial sauces, but we like that. It is light, smokey, sweet and delicious. It is awesome for pulled pork too.

2 cups ketchup
1 cup water
½ cup apple cider vinegar
5 tablespoons white sugar
5 tablespoons brown sugar (I use dark brown sugar)
1½ teaspoons black pepper
1½ teaspoons dry mustard powder
1½ teaspoons dry onion powder (not onion salt)
1 tablespoon lemon juice
1 tablespoon Worcestershire sauce
1 teaspoon liquid smoke

Mix well and simmer (uncovered) for 1½ hours, cool before using. This sauce smells a little vinegar-y while cooking, but the final product is on the sweet side. I like making it a day ahead and storing it in the fridge to let the flavors blend, but that isn't totally necessary.


NOTE: If you like "heat" in your barbecue sauce, just add a little red pepper flakes to the recipe.

NOTE: I often cook this in the crockpot, on high for about 3 hours with the lid propped open a little, with a spoon.

This recipe makes 3 cups of sauce.

Friday, July 15, 2011

SUPER QUICK BBQ SAUCE

I have an admission to make and, in a round about way, it has something to do with today's recipe. The last few years I have suffered from agoraphobia. I panic at the thought of going out in public. I used to love shopping for groceries every two or three days, now I have to force myself out of the house every 7 to 10 days (and then it ends up being a speed trip out and back). There is no reason for this (late in life) development; it is what it is, I guess; I try not to worry about it.

Because of this "disorder", I find myself running out of key recipe ingredients more than I care to. That's where today's recipe comes in.  We planned on cooking outdoors yesterday and I was out of BBQ sauce, so I  tried this recipe. It is made out of common, everyday ingredients,(a good thing for ME) and it is delicious!! I highly recommend it.

1 cup ketchup
2 to 3 tablespoons brown sugar (I used dark brown)
2 tablespoons cider vinegar (I used red wine vinegar)
2 teaspoons chili powder
1 teaspoon ground cumin powder
½ teaspoon garlic powder
1 teaspoon onion powder
1 teaspoon DRY mustard powder
¼ teaspoon salt

Simmer all of the ingredients for a couple of minutes, then cool.  It couldn't be easier!!!

NOTE: Recipe calls for 2 to 3 tablespoons brown sugar. Hubby likes a sweeter BBQ sauce, so I used 3 tablespoons.

Thursday, April 7, 2011

CHOCOLATE MAGIC SHELL

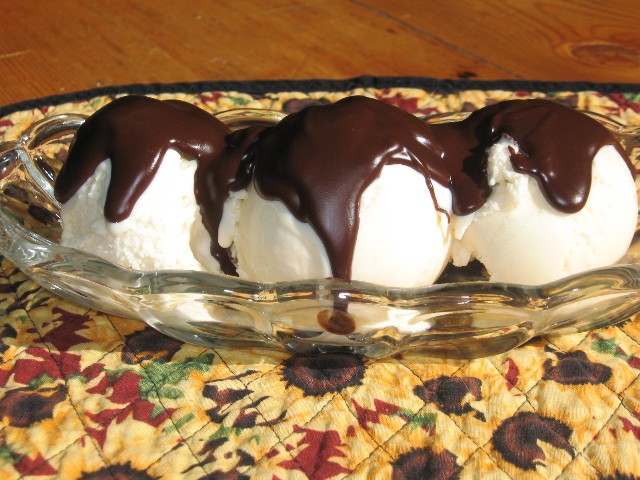
This fast and fun recipe is a delicious chocolate sauce and when you put it on something cold, it turns hard like commercial "Magic Shell" (except a lot more budget friendly). Don't restrict it to ice cream though, how about frozen bananas?

1 cup semi-sweet chocolate chips
¼ cup butter
¼ cup canola oil
¼ teaspoon vanilla extract

Heat the chocolate, butter and oil until the chocolate melts. I do this in the microwave, starting at 30 seconds on high, then stir, then 15 more seconds and stir and a final 15 seconds and stir. At first, it will seem like the ingredients don't want to blend, but whisk it for 10-15 seconds and it will go together beautifully. Once it is smooth, whisk in the vanilla extract.

Cool to room temperature, (you can use it right away, but while it is still hot it will take a few seconds for it to harden on ice cream).

NOTE: If you use your microwave to melt the chocolate, watch it carefully, since your microwave might cook faster or slower than mine and chocolate scorches easily.

NOTE: With the addition of butter & oil, I thought this might have a greasy taste, but it does NOT. While warm (which is my favorite) this has a velvety texture, almost like the best hot fudge sundae taste.

Thursday, March 10, 2011

SUBWAY SWEET ONION CHICKEN TERIYAKI SANDWICH

This is a "knock off" recipe for Subway's sweet onion chicken teriyaki sandwich. It is delicious, only about 370 calories and very quick to fix (as long as you make the sweet onion sauce a day ahead).


 1 pound boneless, skinless chicken tenderloins
.¼ cup soy sauce
¾ cup pineapple juice
½ teaspoon garlic powder
½ teaspoon ground ginger
½ teaspoon dry mustard
¼ teaspoon white pepper
¼ cup brown sugar
2 tablespoons honey
.
Bring everything but the chicken to a boil and simmer for about 5 minutes or until it starts to reduce. Cool completely and pour over the chicken, cover and refrigerate the chicken for about 30-60 minutes.
.
When it's time to eat, take the chicken out of the marinade (throw marinade away) and grill or broil the chicken until done (don't over cook).
.
Place chicken pieces in grilled bun & add favorite toppings. Drizzle with sweet onion sauce. Mmmmmmmmmmm!!! Makes about 6 sandwiches.


SUBWAY SWEET ONION SAUCE This is SO tasty and I find all sorts of uses for it. It is not overly onion-y and not overly sweet. Make it a day ahead of time to let the flavors blend and mellow.
½ cup light corn syrup
1 tablespoon finely minced vidalia onion
1 tablespoon red wine vinegar
2 teaspoons white distilled vinegar
1 teaspoon balsamic vinegar
1 teaspoon brown sugar
1 teaspoon buttermilk powder
¼ teaspoon lemon juice
1/8 teaspoon poppy seeds
1/8 teaspoon salt
pinch cracked black pepper
pinch garlic powder
.
Combine all ingredients and bring to a boil for about 30 seconds. Whisk well and cover and chill overnight.

NOTE: If you don't have vidalia onion, a white onion will work, just mince it VERY finely. I've even used re-hydrated onion flakes successfully, although the vidalia onion is best.

Tuesday, January 11, 2011

TACO BELL RED SAUCE CLONE RECIPE

I admit it, there are certain items that I really enjoy at Taco Bell. Yes, I know it's not authentic Mexican food, but when you like something, well, you overlook things like that. One thing I enjoy at TB is a warm condiment called red sauce. It is not the (cold) hot sauce that comes in a packet; it is the steaming hot red sauce that is served on their tostados and their Mexican pizza. This recipe is about as close to the original taste as you can get!!!
1 8 ounce can of tomato sauce
1/3 cup water
¼ teaspoon chili powder
1½ teaspoon ground cumin
1½ teaspoons dry onion flakes
1 tablespoon white vinegar
½ teaspoon garlic powder
½ teaspoon garlic salt
¼ teaspoon paprika
¼ teaspoon white sugar
¼ teaspoon cayenne pepper
Mix everything and simmer (on very low) for 15-20 minutes. Serve hot. The "spice level" is very moderate if you use it right away. It is a little spicier if you let it sit in the fridge overnight.
Serve (as a hot condiment) with any Mexican food.


I like this as a dip for chips too.
NOTE: I was surprised to see that there is vinegar in this sauce (you can't taste it in the final product).
NOTE: I don't usually buy garlic salt. I just mix it up with 3 parts salt to 1 part garlic powder, stir well.


Tuesday, November 16, 2010

HEINZ CHILI SAUCE CLONE

This is a clone recipe for Heinz chili sauce. It is so easy...takes every day ingredients and is even tastier than the original!! Chili sauce was never a pantry staple for me; I always found it on my shopping list for holiday and special occasion recipes, like this shrimp cocktail (which calls for Heinz chili sauce). I will never buy commercial chili sauce again because this is so much better (and cheaper)!!!


1 cup of tomato sauce
1/3 cup light corn syrup
¼ cup white vinegar
2 teaspoons dry onion flakes
2 teaspoons granulated sugar
1 teaspoon salt
1 teaspoon lemon juice
1/8 teaspoon garlic powder

Whisk everything together and bring to a boil in a small saucepan with a heavy bottom. Turn heat down to a low simmer and cook for 25-30 minutes, depending on how fast you are simmering it (mine was done in 25 minutes). Watch it towards the end so it doesn't scorch.
Cool to room temperature, then cover and chill.
It will get nice and thick like this.

NOTE: I made this recipe, exactly as it is stated above, I don't know how it would effect the final results if you use fresh onions.

Friday, October 22, 2010

CRANBERRY SAUCE


I have been trying out various side dishes and condiments with Thanksgiving in mind. Lately, I've been trying out cranberry sauce recipes. If you follow my blog, you know my dear sweet Hubby is a "purist" when it comes to a lot of foods. Actually, that just means he is very picky eater and doesn't like a lot of "extras" in what he eats. This simple cranberry sauce really fills that bill; he loves it and has asked me to stock up on cranberries for the freezer, with this recipe in mind.
Three Simple Ingredients:
12 ounces fresh cranberries
1 cup granulated sugar
1 cup pineapple juice (or orange juice)
Wash and sort the berries, and put all ingredients into a heavy bottomed sauce pan. Bring to a boil, then turn heat to a medium simmer and cook the berries (stirring berries about once a minute) for 20 minutes. When they first start to boil, the berries will actually pop, so cover the boiling berries with a splatter screen to reduce any mess.

If you like whole berry cranberry sauce, just pour it into a bowl and chill for a few hours For  Picky-picky Hubby, I press the sauce through a strainer to remove the berry skins. Sauce will thicken as it cools.NOTE: I am not usually a cranberry sauce fan, but I found this to be excellent.

UPDATE: Since I posted this, I've discovered that using half white sugar and half brown sugar is a fantastic addition.

Search This Blog

Popular Posts

Like This

 
Copyright © 2011. Area Information: CONDIMENTS . All Rights Reserved
Company Info | Contact Us | Privacy policy | Term of use | Widget | Advertise with Us | Site map
Template modify by Creating Website. Inspired from CBS News