Showing posts with label CHICKEN RECIPES. Show all posts

Monday, December 3, 2012

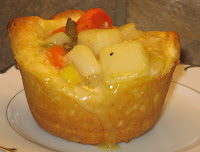
MINI CHICKEN POT PIES

 MINI CHICKEN POT PIES

  • 2 potatoes  cubed small
  • 1 cup favorite veggies  (I use a frozen pea-corn-green bean mix)
  • 1 stalk celery chopped fine
  • 1 tablespoon onion chopped fine
  • 1 carrot sliced thin
  • cooked chicken breast small cubed
  • 1 tube of refrigerator rolls (see note about brand)
  • 3 tablespoons butter
  • 3 tablespoons flour
  • 2½ cups chicken broth (see note)
  • 1/2 teaspoon salt
  • pepper to taste

In a large sauce pan, saute the onion and celery in a little butter until soft. Add the chicken broth and the potatoes, veggies, salt and pepper. Boil about 5-8 minutes or until fork tender.

Remove the veggies and SAVE THE BROTH!! In a medium size sauce pan, melt 3 tablespoons of butter then add 3 tablespoons flour and stir, (cook for about a minute to cook out the raw flour taste).  Add the saved chicken broth (whisk like crazy when you add the broth). Cook until the mixture thickens, then put the cooked veggies back in. Remove from heat and set aside.

Spray a Texas size muffin pan lightly with vegetable spray (even if it is a non-stick pan). Roll out each refrigerator biscuit very thin and place one in each muffin cup.


Then use your fingers to press the thinned out biscuit up the sides and to the top of each cup.

NOTE: If you don't have a Texas size muffin pan, see note below.

NOTE: I've tried all brands of refrigerator biscuits, and the very best one (for this recipe) is a Kroger brand biscuit called    JUMBO butter biscuits  (our Fred Meyer sells them).

Place cooked chicken in the bottom of each little pot pie and then spoon the veggies and gravy over it (almost to the top).

Place the muffin pan on a cookie tray and bake in preheated 375 oven for 20 minutes or until golden brown and bubbly.

Remove from oven and let sit for 3 or 4 minutes, this will really help in removing them from the pan. Don't worry, they stay hot forever!! Use a butter knife to assist you in lifting these out of the pan.


NOTE:  If you use broth made from bullion, leave out the salt.

NOTE: On occasion, I buy Pillsbury Grands refrigerator biscuits, but they don't work well for this recipe (too bready). The Kroger brand of Jumbo Butter Biscuits roll out nice and thin and they bake into a thin crusty-buttery shell.

NOTE: I don't think this recipe will work very well in a standard cupcake pan unless you chop everything VERY small and use only half of a refrigerator biscuit (but I've never tried it).


QUICK and EASY STICKY CHICKEN WINGS

2 pounds of chicken wing sections
½ cup soy sauce
½ cup brown sugar
½ teaspoon black pepper
pinch of red pepper flakes (optional)
20 ounce can of pineapple chunks (drained well)

Cut the wings into sections, discarding the wing tip (or buy already cut up party wings) and place in a 9" x 13" (greased) baking dish.  Mix everything else together and spoon over the wings.

Bake in a 350 oven (uncovered) for 1½ hours, turning everything over every 30 minutes or so. Now I know that seems like a LONG time for chicken wings, but trust me, it does takes that long for the wings to "break down" and be super tender, sweet and juicy and sticky!!

Remove the wings and pineapple from the sauce and serve  (discard the sauce). Hubby likes the pineapple chunks, but I don't care for them...your choice.

NOTE: Do not omit the pineapple, the flavor and moisture content of the fruit is important to the cooking process.

NOTE:  The last 30 minutes of bake time, the chicken wings will get shiney and sticky!!

NOTE: If you are still in doubt about the 1½ hour cooking time, click on the above photo and you will get a better look at the wings themselves and you will see they are juicy and not overcooked.

Sunday, March 25, 2012

CHICKEN SOUP FOR A SICK HOUSE

I haven't posted much lately because picky-picky husband and I have had the flu. Not just your every day "better in a week flu", but the old fashioned (don't even get out of your jammies) flu that has plagued us with lethargy and coughs for almost a month.

Our meals have been simple and mostly from the crock pot (or frozen food entree aisle) but then we haven't had much of an appetite either. Now that we are feeling a little better, I am venturing back into the kitchen.

This chicken soup has been a life saver for us during this time. I just keep it going in the slow cooker, adding a little more broth and veggies when necessary. It is a super simple recipe and if your family is coping with this ugly flu, like we are, I hope you will give this magic "elixer" a try.


6 large boneless-skinless chicken thighs (dark meat has the best flavor)
1 cup chopped onion (I like to use sweet onions)
1 cup chopped celery
1 cup chopped carrot
2 quarts of good chicken stock (I use the boxed kind)
1 tablespoon chicken bullion granules
1/2 teaspoon black pepper
1 teaspoon salt
pinch of dried thyme
pinch of poultry seasoning
2 cups favorite veggies (I use frozen mixed veggies)
spaghetti or fettuccine noodles (they hold up better than other noodles)

Cube and brown the chicken thighs in a tablespoon of oil until you get brown crusty spots on the chicken. Remove from pan and put it into the crock pot. In the same pan, saute the onion, celery and carrot until they get a little soft. Use a spatula and use the moisture in the veggies to de-glaze any crusty bits left in the bottom of the pan. Add this mixture into the crock pot ; those crusty brown bits in the pan are PACKED with chicken flavor.

Add the broth, 2 cups favorite veggies, bullion granules and salt and pepper. Stir and cook on high for about 6 hours, stirring once in a while. Half an hour before you serve this soup, break the noodles into 4" pieces and put into hot broth and stir. The noodles should be ready to eat in about 30 minutes.

NOTE: I have tried many different kinds of noodles in this soup. Spaghetti seems to hold up the best without turning to mush if you are cooking the soup for a long time or overnight. I also use rice instead of noodles, however, DO NOT put the rice into the soup (after a while, it will deteriorate and make your soup a mushy mess). Instead, make the rice separately and put a big spoon of it in your soup bowl and ladle the soup over the rice.

NOTE: Any cut of chicken will work in the soup, however, the dark meat gives the most flavor and after 6 hours, it will still be very moist and "fall apart" tender.


NOTE: Any kind of veggies can be used for the "favorite veggies" part. Just make sure you use veggies that will stand up to long cooking. I usually use a frozen veggie mixture that has peas, corn, green beans and carrots, but anything will work (just don't used canned veggies).

NOTE: Homemade chicken broth is best, but I never seem to have any when I want to make this soup, so I use a good quality BOXED chicken broth (just don't use bullion and water to make broth).

Friday, January 27, 2012

CROCKPOT CHICKEN CHILI

This is a new recipe experiment for us and I must tell you it was delightful. It is one of those rare meals that is not only good for you, but it's very tasty, very hearty and it rings all the familiar bells of comfort food.

This recipe is also a breeze to make because you put most of the ingredients in the crockpot the night BEFORE you want to serve it (no need to pre-soak the beans) and then in the morning, you just add the chicken and carrots and let it cook all day!! It will make your house smell fantastic!!

1½ cups DRY Great Northern white beans (rinsed)
4 boneless skinless chicken breasts
1 cup chopped onion (sauteed)
4 ounce can mild green chile's
2 cups grated carrots
3 teaspoons chili powder
1 teaspoon ground cumin
½ teaspoon dry oregano leaves
1/8 teaspoon cayenne pepper (or to taste)
1 teaspoon salt  (see note below)
½ teaspoon black pepper
6 cups chicken stock (see note below)
1 cup Monterrey Jack Cheese shredded

Wash and sort the dry beans (do not pre-soak) and put them in the crockpot. Add the stock, sauteed onion, seasonings and chile's. Cook on LOW setting overnight (or about 8 hours).

In the morning, remove about a cup of the beans and mash them thoroughly. (I put them in the blender)  Return the mashed beans to the crockpot; this will thicken up the broth in the chili.

Cut the raw chicken into large pieces and add it to the crockpot along with the shredded carrots.  Cook this on high for 6 to 8 hours. If your crockpot runs very hot (as some of them do) cook it on low instead.

About 30 minutes before you want to serve the chicken chili, add the shredded Monterrey Jack cheese and stir.
I hope you like this hearty "good for you" chili as much as we did.

NOTE: If you use salt free chicken broth, go ahead and put the teaspoon of salt into the chili. Taste it again after it is finished cooking (and you've added the cheese) to see if it still needs more salt.   If you use chicken broth made from bullion, I wouldn't add any salt to the recipe, as the bullion broth is already quite salty.

NOTE: I hope you don't leave out the grated carrot, it really adds a wonderful taste and texture to the chili.

NOTE: We are fairly timid when it comes to spicy heat in our food. The recipe calls for 1/8 teaspoon of cayenne pepper. I used a scant 1/8 teaspoon and it was absolutely perfect for us. If you like more heat in your food, add more cayenne.

Thursday, March 10, 2011

SUBWAY SWEET ONION CHICKEN TERIYAKI SANDWICH

This is a "knock off" recipe for Subway's sweet onion chicken teriyaki sandwich. It is delicious, only about 370 calories and very quick to fix (as long as you make the sweet onion sauce a day ahead).


 1 pound boneless, skinless chicken tenderloins
.¼ cup soy sauce
¾ cup pineapple juice
½ teaspoon garlic powder
½ teaspoon ground ginger
½ teaspoon dry mustard
¼ teaspoon white pepper
¼ cup brown sugar
2 tablespoons honey
.
Bring everything but the chicken to a boil and simmer for about 5 minutes or until it starts to reduce. Cool completely and pour over the chicken, cover and refrigerate the chicken for about 30-60 minutes.
.
When it's time to eat, take the chicken out of the marinade (throw marinade away) and grill or broil the chicken until done (don't over cook).
.
Place chicken pieces in grilled bun & add favorite toppings. Drizzle with sweet onion sauce. Mmmmmmmmmmm!!! Makes about 6 sandwiches.


SUBWAY SWEET ONION SAUCE This is SO tasty and I find all sorts of uses for it. It is not overly onion-y and not overly sweet. Make it a day ahead of time to let the flavors blend and mellow.
½ cup light corn syrup
1 tablespoon finely minced vidalia onion
1 tablespoon red wine vinegar
2 teaspoons white distilled vinegar
1 teaspoon balsamic vinegar
1 teaspoon brown sugar
1 teaspoon buttermilk powder
¼ teaspoon lemon juice
1/8 teaspoon poppy seeds
1/8 teaspoon salt
pinch cracked black pepper
pinch garlic powder
.
Combine all ingredients and bring to a boil for about 30 seconds. Whisk well and cover and chill overnight.

NOTE: If you don't have vidalia onion, a white onion will work, just mince it VERY finely. I've even used re-hydrated onion flakes successfully, although the vidalia onion is best.

Wednesday, January 5, 2011

SESAME CHICKEN

Our Safeway store has the best sesame chicken and I've tried to recreate it, several times, with minimal luck. However, this last try was very good and even Hubby liked it!!
 2 tablespoons soy sauce
1 tablespoon cooking wine
3 drops sesame oil
1 teaspoon vegetable oil
2 tablespoons flour
2 tablespoons corn starch
2 tablespoons water
¼ teaspoon baking powder
¼ teaspoon baking soda
½ teaspoon onion powder
Mix the above ingredients thoroughly, then add 1½ pounds of chicken breast cut into 1" cubes. (see note) Stir to coat and chill for 30 minutes before frying.
..
SAUCE (this cooked sauce is poured over the cooked chicken)
½ cup water
1 cup chicken broth
2 tablespoons white vinegar
½ cup granulated sugar*
¼ cup corn starch
2 tablespoons soy sauce
1 teaspoon sesame oil
¼ to ½ teaspoon red pepper flakes**
1 clove garlic minced
.
Bring to a boil (it gets very thick). Keep warm while you fry the chicken
.
Deep fry the chicken cubes, a few at a time, until they are done and batter is golden. Keep warm in oven while you fry the rest. Just before serving, add some of the sauce to the chicken and gently stir (you might not need all of the sauce) .
.
Serve over hot rice.

NOTE: Original recipe called for a full cup of sugar, but that seemed like overkill. I used ½ cup and it seemed perfect.
.
NOTE: We are very shy of extra-spicy food. I used ¼ teaspoon of the red pepper flakes and it was VERY mild. I think next time, I will use ¼ teaspoon + an extra pinch.
NOTE: The recipe calls for chicken breast, but we prefer either chicken tenderloins or boneless thigh meat.

Friday, October 29, 2010

CHICKEN TETRAZZINI WITH HOME MADE PASTA

One of our favorite dinners is Chicken Tetrazzini with home made pasta.

It is simple and inexpensive to make and (in my opinion) pure comfort food.

4 boneless, skinless chicken breasts
4 cups of good chicken broth
1 medium onion chopped
3 stalks of celery chopped
2 carrots cut into chunks
1 teaspoon salt
½ teaspoon black pepper
.
Put the above items in a crock pot, on low, for 6-8 hours (you want extremely tender chicken). Remove the chicken and break into pieces. (see note).
In medium saucepan, with heavy bottom, melt 3 tablespoons of butter; add 3 tablespoons flour + ½ teaspoon black pepper + 2 teaspoons chicken bullion granules. Let this simmer (stirring) for a couple of minutes, then add 2½ cups of milk (whisk like crazy as you slowly add the milk so you do not get lumps). This entire mixture will thicken as it comes to a boil.
.
When the mixture boils and thickens, turn heat to LOW and add broken up chicken breast pieces, 1 cup frozen peas, 1 cup sauteed mushrooms, 2 tablespoons chopped parsley, a pinch of dry red pepper flakes and 1 cup shredded Monterrey Jack cheese. Let this cook on low (to warm everything through) but watch it because it can scorch if the heat is too high. Serve over fettuccini noodles.
.
If you are going to make your own pasta, here is an easy recipe:
Put 2 cups of all purpose flour in a heavy duty stand mixer. Make a “well” in the flour and put in five whole eggs:

Mixing with your paddle attachment, mix until the eggs are well incorporated into the flour. It shouldn’t be sticky; if it is, add a little more flour. Remove the paddle attachment and add the dough hook. Knead with the dough hook for about 5 minutes. Dough should be very smooth. Cover with plastic and let it rest for about 30 minutes before you cut it.
.
Keep majority of dough covered with plastic wrap and work with a small ball of dough at a time. A small ball like this:


will roll out to a flat ribbon like this!

Fold the flat ribbon over onto itself a couple of times and run it through the roller four or five times. Roll the dough out one last time and dust it lightly with flour. Now you are ready to run it through the cutter. Two small balls of pasta dough (like the one in my hand above) made this much cut pasta!!
Bring a big pot of salted water to a full boil. Fresh (un-dried) pasta cooks in about 3 minutes. If you have let your pasta air dry, it takes about 8 to 10 minutes to boil (depending on its thickness).
.
NOTE: I’ve noticed when boiling fresh pasta, it tries to “boil over” more easily than commercial pasta. If you add just a few drops of oil to the water, it will stop that.
.
NOTE: A (bristle type) pastry brush is great for brushing off excess flour from your pasta dough.
.
NOTE: If you do not have a pasta roller/cutter, you can still make home made pasta by rolling it out super thin and cutting it with a pizza cutter.
NOTE: Cool and save the liquid from the crock pot for another recipe, it is excellent broth.

Wednesday, October 13, 2010

CHICKEN MARINADE

This marinade for chicken, works best if you let the meat marinate overnight. It is excellent for taco's, burritos, sandwiches, chicken salad, etc. It is a wonderfully flavored chicken to have in the fridge for a wide variety of recipes.
.
4 boneless, skinless chicken breasts
1 cup cold chicken broth
2 teaspoons soy sauce
1 teaspoon salt
2 teaspoons brown sugar
1 teaspoon onion powder
½ teaspoon liquid smoke flavoring
½ teaspoon black pepper
¼ to ½ teaspoon red chili flakes

Mix all marinade ingredients in a Ziploc type resealable bag. Add chicken, making sure it is submerged in the marinade. Refrigerate overnight if possible. Next day, remove from marinade and THROW AWAY THE LIQUID.
.
Lay the chicken on a paper towel to wick away excess liquid. Grill (indoor or outdoor) until juices run clear. Use immediately in favorite recipe or cool to room temperature, then refrigerate.


Sunday, March 21, 2010

SIMPLY GREAT CHICKEN

I found this excellent recipe on Katy's Food for a Hungry Soul web site. I've made it a couple of times and it is hard to fathom that such a wonderful taste comes from THREE ingredients; it could not be easier or more satisfying.
3½ pounds of boneless-skinless chicken
(1) .7 ounce packet of DRY Italian salad dressing mix
½ cup of brown sugar

Yes, that's it!! Mix the dry salad dressing mix (I used Good Seasons brand) with the brown sugar. Wash and pat dry the chicken and coat all sides with the mixture. Place the chicken in a sprayed 9x13 baking dish and sprinkle any leftover mix over the chicken. Bake it at 350F for 50-60 minutes (depending on how big your chicken pieces are). I spoon the sauce over the chicken several times during the last 20 minutes of cooking.

The first time I made this, I used 8 whole boneless-skinless thighs. The next time, I cut the same amount of thighs up into pieces. Next time I will leave them whole, we liked it better that way.

When you first put this recipe in the oven, the seasonings smell a little "strong" but it all mellows out as it cooks and the chicken is juicy, tender and the sauce is fabulous.

NOTE: If you are lucky enough to have any leftovers, this chicken makes excellent fried rice the next day.

Wednesday, March 17, 2010

KATY'S CHICKEN

Katy is one of the sweetest souls I've met in the blogging world. Her web page is called Food for a Hungry Soul; do yourself a favor and check out her recipes. I especially enjoy her chicken recipes because her "Ole Sweetie-Pi" and my "Hubby" have very similar taste when it comes to anything more elaborate than red meat and potatoes.

Katy's original title for today's post was Oven Fried Chicken with Honey Butter Sauce...however at our house, we just called Katy's chicken and it is delicious!! Thanks for sharing the recipe Katy.


1 tender frying chicken, cut up for frying
1 cup flour
2 teaspoons salt
1/4 teaspoon pepper
2 teaspoons paprika
1/2 cup butter

SAUCE
1/4 cup melted butter
1/4 cup honey
1/4 cup lemon juice (I used pineapple)
(I added a pinch of dry red pepper flakes)

Dip chicken pieces into mixture of flour, salt, pepper, and paprika. Melt one stick butter in a shallow baking pan in a hot oven (400 degrees). Remove pan from oven. Arrange chicken in single layer in pan, turning to coat with butter. Bake skin side down at(400F) 30 minutes. Turn chicken.

For the sauce, melt 1/4 cup butter and add the honey and lemon juice. Pour the sauce over chicken and bake another 30 minutes or until fork-tender. Baste often, with the sauce, during last 15 minutes of baking,

I decided to use 4 boneless skinless chicken breasts instead of a whole chicken. Assuming I wouldn't need as much flour mixture, I followed Katy’s directions (well almost) and made only half of the flour mixture. I also substituted pineapple juice for the lemon juice. I baked the floured chicken breasts 25 minutes at 400F and then covered them with the sauce and baked them for another 20 minutes (basting them with the sauce every 5 minutes or so).

This recipe is so simple yet produces an extremely tender and juicy chicken breast. I made a few extra and we are looking forward to making some great chicken sammie’s tomorrow.


Tuesday, February 2, 2010

CLASSIC CHICKEN-RICE BAKE

I think all cooks have their own version of this baked chicken and rice recipe. Some people use cream soups, some use broth, but they all call for baking chicken and rice together in the oven. This is our version (my favorite part is the rice). I usually put in tons more chicken than the recipe calls for, because it is a "freebie" way of making sandwich fixings (not to mention, chicken cooked this way has a wonderful flavor).
.
4 boneless, skinless chicken breasts (I use 6)
1 can cream of chicken soup
2 cups chicken stock
2 tablespoons chicken bullion granules
1 cup raw long grain white rice
½ teaspoon black pepper
¾ teaspoon poultry seasoning (see note)
½ cup chopped onion
½ cup chopped celery
16 ounce bag frozen peas & carrots
.
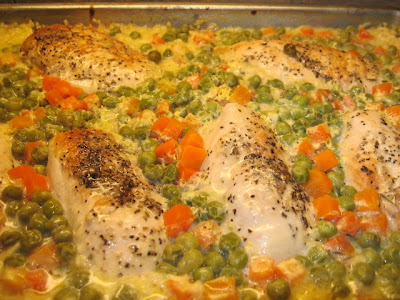
Brown the chicken breasts in a couple tablespoons of butter then set them aside. In the same pan that you browned the chicken in, saute the onion and celery until tender, then stir in the raw rice (you stir in the rice so that it will get coated with butter and not stick together while baking). Once the rice has sauteed for a minute or so, add the soup, stock, chicken bullion and spices. Whisk until smooth. Pour this mixture into a greased 9 x 13 baking dish and stir to distribute the rice evenly. Set the browned chicken on top of the rice (push it down into the liquid a little) and top the whole casserole with frozen peas & carrots. Cover tightly and bake at 325F for 1½ hours (if the chicken breasts are large).

NOTE: I don't buy poultry seasoning because I use it so seldom and it goes to waste. Instead, I use equal parts of dry rosemary, rubbed sage leaf and thyme leaves and a pinch of marjoram. I grind these together then measure ¾ teaspoon.

Wednesday, January 27, 2010

BAKED CHICKEN 101

It seems there are two camps of thought when it comes to baking a chicken. Either you are an old hand at it (if so, today's post will be "old hat") or... the chicken carcass freaks you out; if you are in the second camp, this post is for you. It really is easy to do and opens up a whole world of recipes.


First of all, I'd like to say it is hard to beat a deli made rotisserie chicken for convenience (and they taste pretty good), but with the price of raw chicken coming down (I found whole chickens at our local FM for 89 cents a pound which is a good price here in Alaska) it only makes sense to bake the chicken at home. There are no magic tricks for baking a chicken; stick to a couple of simple rules and you've got it made. Also, if you have a large roasting pan, you can bake a couple of these fat hens at the same time and you'll have enough chicken on hand (for sandwiches, salads, quick dinners, etc.) for the whole week.

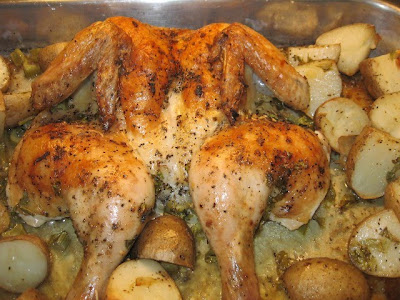
I used to bake chickens whole (like you would a turkey), but was grossed out by the empty chicken cavity that filled with unappetizing-colored juices as it baked. To remedy that, I split the chicken open, removing the backbone and baked it flat. Now those mystery juices turn into a wonderful golden broth in the bottom of the pan and the whole dinner looks so much more appetizing.


First start off with whole chickens that are 3 to 4 pounds each. Remove them from their wrapper and sit the chickens, one at a time, in your kitchen sink. Steady the chickens in the upright position, with legs pointing down. Using a sharp knife, remove the backbone. Starting at the neck and slice down, along side of the backbone, all the way down to the tail section; repeat on the other side. Remove the backbone and discard (or see note). Removal of the backbone can also be done easily if you have a pair of very sharp kitchen scissors.


Once the backbone is removed, rinse the chicken thoroughly in running cold water, rubbing down all parts of the meat (see note); dry with paper towels. Because you will want this chicken to lay out flat in the roasting pan, crack (or cut) the breastbone but don't cut down into the meat. Once you crack the breastbone, you should be able to open the chicken and lay it down flat in a roasting pan like this:


Any surface with chicken skin should be facing towards you.
Brush the chicken skin, lightly, with butter and sprinkle lightly (about ½ teaspoon) of onion powder then generously with salt and pepper. Surround with favorite veggies if you like.

Bake, uncovered, at 375F for 1½ hours (for 4 pound chicken). Remove from oven and cover loosely with foil and let it rest for 10 minutes. This produces a very tender and juicy chicken.
NOTE: It doesn't matter where you get your chicken from or what brand you buy; you still need to be very careful about cross-contamination when it comes to chicken.

ANYTHING that touches raw chicken (from your hands to utensils, to cutting boards,
to dish towels and sinks) needs to be washed thoroughly with warm soapy water before you touch anything else. I go a step farther and use a bleach based kitchen cleaner on all surfaces after preparing chicken.
NOTE: The backbone that you removed makes great chicken stock. Keep a resealable bag in the freezer and throw the backbones in there. When you get half dozen or so, you can make a fantastic chicken stock by throwing them in a pot of water (2 quarts) and adding onion, celery, carrots and peppercorns; simmer it all for a couple of hours then strain it. The crockpot is also excellent for making chicken stock.

Monday, October 5, 2009

CHICKEN BAKED POTATOES and CHICKEN AND DUMPLINGS

This weekend was cold, rainy, gloomy and leaf-less; without falls bright yellow leaves everything looks so dreary. We've had several hard freezes and the snow line on the mountain behind our house is creeping very near; it won't be long. To celebrate the completion of our annual "winterizing", we decided to enjoy a lazy weekend. Saturday, I put chicken breasts and veggies in the crockpot and at dinner time, I just thickened the broth and served it on split baked potatoes. We also had some of those brown and serve dinner rolls I posted last week...very satisfying meal.


4 boneless, skinless chicken breasts
3 cups chopped veggies
½ cup chopped onion
1 cup chopped celery
1 cup chopped carrot
4 cups good quality chicken broth (not bullion)
pinch of dried thyme
pinch of poultry seasoning
pinch of dried basil
½ teaspoon black pepper
1 teaspoon salt
Saute onions in a little butter until they mellow, then put everything in the crockpot and cook on low for about 6 to 8 hours (check for chicken tenderness at 6 hours). You want the chicken to be nice and "fall apart" tender. Thicken broth and serve over large baked Yukon gold potatoes that are cut in half.

On Sunday, I used the crockpot leftovers for another lazy day meal, Chicken and Dumplings.
My mother made wonderful chicken and dumplings, so Sundays dinner was a trip down memory lane for me...Hubby, not so much. He courageously gave the dumplings a taste then gave me one of those squinty sidewards "I don't think so" glances and politely moved the dumplings over to the side of the bowl and ate everything else. Oh well, I enjoyed them thoroughly.

In a saucepan, cook 3 diced potatoes in seasoned (salt & pepper) chicken broth. Add them to the crockpot leftovers. For chicken and dumplings you want a liquid that is the consistency of gravy. If your leftovers seems to thick, add just a little bit of the chicken broth you boiled the potatoes in. If it seems too thin, thicken it with a little bit of corn starch slurry. When your gravy is the right consistency, bring it to a strong simmer.

Dumplings
2 cups all purpose flour
2 teaspoons baking powder
1 teaspoon chicken bullion granules
2 tablespoons melted butter
3/4 cup milk
pinch of poultry seasoning

Mix everything JUST UNTIL MOISTENED and let it sit for about 5 minutes. Drop heaping teaspoons of dumpling mixture onto the SURFACE of the simmering gravy. Put a TIGHT FITTING lid on the pan and cook for 15 minutes (do not peek). At the end of 15 minutes, test the dumplings for doneness with a toothpick. If they are not cooked thoroughly, put lid back on and cook another 5 minutes. Spoon gravy over dumplings before serving.

Wednesday, August 19, 2009

PIZZA CHICKEN

I came up with the idea for pizza chicken one day when afternoon thunder showers cancelled my grilling plans. There I was, faced with (yet another) potentially boring package of boneless, skinless chicken staring at me.

The food fairies must have been at my house that day, because the recipe idea just popped into my head and it has been a huge hit ever since. The first time I served this to picky-picky husband, he gave me that, all too familiar, sidewards glance as if to say...you expect me to try this? But, to his credit, he took a bite and his eyes opened wide as he said "this is REALLY good!!" I almost fell off of my chair. The recipe immediately became one of our favorite quick fix dinners.


I took boneless, skinless chicken breasts and sliced them horizontally (to make two or three THIN chicken cutlets which I breaded and browned. I placed them on a baking sheet and topped them with pizza sauce (recipe follows) and a generous handful of mozzarella cheese and heated them through...thats it!!

PIZZA CHICKEN
3 boneless skinless chicken breasts
2 eggs
all purpose flour for breading
dry bread crumbs for breading

1/4 cup finely chopped onion
1/4 cup finely chopped celery
1 clove garlic minced
2 tablespoons olive oil
(1) 6 ounce can of tomato paste
(1) 6 ounce can of water
1 teaspoon dry sweet basil
1 teaspoon dry oregano
1/2 teaspoon fennel seeds (do not leave out)
1/2 teaspoon salt
1 teaspoon sugar
1/4 teaspoon black pepper
pinch dry crushed red pepper flakes


Depending on how thick the chicken pieces are, slice them horizontally into two or three thin layers. Coat each layer with all purpose flour, then dunk them into beaten eggs, then coat them with a generous layer of fine dry bread crumbs. Brown these cutlets in a little canola oil and set them on paper towels to drain. Because they are thin, they will cook quite quickly.


Next make the pizza sauce: Saute the onion, celery and garlic in the olive oil until they are tender. Add the rest of the ingredients and bring to a boil on medium-high heat. The sauce will thicken up very quickly after it comes to a boil which is what you want (thick). Remove from heat and set aside.


Top the browned chicken with the pizza sauce (dividing equally between the cutlets) and top with a generous handful of mozzarella cheese.


Bake at 350 until the chicken and sauce are nice and hot and the cheese is melted (about 15 minutes).

NOTE: Add any veggies you like on pizza (before you put it in the oven).

NOTE: If you have any leftovers, pizza chicken makes a delicious sandwich!!

NOTE: If you decide to use a commercial pizza sauce, just make sure it is a very thick one (but I hope you will use the above recipe instead).

Thursday, August 6, 2009

SPEEDY WEEK NIGHT CHICKEN DINNER

This quick fix chicken dinner is one of my "go to" week night recipes. I always keep boneless, skinless chicken in the freezer, so I can whip this up in a hurry. It is one of those easy recipes that you can cook with your eyes closed and yet its sweet and (mildly) spicy flavor will please just about everyone. We don't care for super-spicy food, so the ingredients below were designed for us. If you like more spice, just increase the amount of crushed red pepper flakes. Leftovers reheat very well in the microwave and make a great hot sandwich the next day.


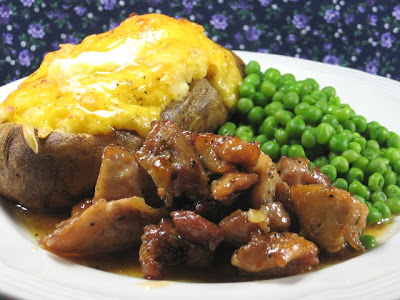
Cut 2 pounds of boneless, skinless chicken thighs into nugget size pieces. Roll them in flour, then in beaten eggs, then back in flour. Sprinkle them with black pepper and brown them in about 1/4 cup of canola oil.


When they are nice and brown, remove them from the pan and drain on paper towels. Wipe the grease out of the pan and add the following:


1 cup of favorite barbecue sauce

1/4 cup of water

1 tablespoon honey

scant 1/4 teaspoon crushed red pepper flakes


Return to heat and mix sauce thoroughly. When it is bubbly, put the chicken in the sauce and stir to coat all of the pieces (I use a wide flat spatula to turn the pieces in the sauce).


Lower the heat and let the sauce sink into the chicken and caramelize a little in the pan. The chicken will be ready to serve when the sauce darkens (about five minutes).


NOTE: I have used chicken breast in this recipe, but it is not as moist and tasty as chicken thighs.

NOTE: Once you have put the sauce on the chicken, keep the heat down and watch it because it can scorch easily.
NOTE: I don't add salt to the sauce because there is plenty of salt in the barbecue sauce.

Tuesday, June 9, 2009

CHICKEN POT PIE

In my dictionary, Chicken Pot Pie is (should) be listed in the definition of comfort food. This recipe makes a 9x9 pie, packed with chicken, onions, celery, mushrooms, broccoli, red bell pepper, fresh green beans, white sauce and it is all baked together in a seasoned double crust.

2 cups of cooked chicken (bite size)
1 tablespoon butter
2 cups of broccoli (bite size)
2 cups of mushrooms (sliced)
2 cups of fresh green beans (bite size)
1/2 cup red bell pepper (cut small)
1/2 cup celery (sliced thinly)
1/2 cup onion (chopped finely)
4 tablespoons butter
3 tablespoons all purpose flour
2 heaping teaspoons chicken bullion granules
1/2 teaspoon black pepper
2 & 1/2 cups milk

When I make this recipe, I use boneless, skinless chicken thighs and cook them in the crockpot the night before (set on low & covered with chicken broth & salt and pepper). In the morning, I take the chicken out and cut it up and refrigerate it until time to make the pie (deli chicken works too).

In large frying pan, melt 1 tablespoon of butter and saute the broccoli, mushrooms, green beans and bell pepper just until they start to get tender and reduce in size (set aside).

In a medium size, heavy bottomed saucepan, melt 4 tablespoons of butter over medium high heat. Saute the onion and celery in the butter until they start to turn sweet and then add 3 tablespoons of all purpose flour, 1/2 teaspoon of black pepper and 2 heaping teaspoons of chicken bullion granules. Let this simmer gently (stirring) for about a minute (this will remove the flour taste), then add 2 & 1 /2 cups of milk and whisk like crazy to avoid lumps. Once mixed well, stir gently until this mixture boils and gets nice and thick (consistency of gravy).

To Assemble pie:
Divide pastry crust dough into 2 pieces (one piece should be about 2/3 of the dough and 2nd piece 1/3 of the dough). The recipe for the dough follows, or you can use ready made. Roll out the larger piece, into a 13" square and fit it into the bottom of a 9x9 baking dish. Lay diced, cooked chicken in the bottom of the crust then top with the sauteed veggies; pour the sauce over everything. Roll out the remaining dough and lay over the filling, pinching the edges. Cut steam vents in the pie and bake in preheated oven (at 425) for 35 minutes.

CRUST
2 cups all purpose flour
2/3 cup + 2 tablespoons butter flavored Crisco
1/2 teaspoon black pepper
2 tablespoons chopped parsley
1 teaspoon onion powder
1 teaspoon celery seed
5 tablespoons cold water

Cut the Crisco into the dry ingredients until it is about the size of very small peas. Add the cold water and mix until everything is moist and the dough comes away from the side of the bowl cleanly. Cover with plastic wrap and let it rest while you saute the veggies. Roll dough out on lightly floured counter.
NOTE: Put a cookie sheet (that has an edge) under the pot pie as it cooks, just in case there is a spill-over.

Saturday, May 9, 2009

CHICKEN FINGERS

Chicken Fingers are an excellent appetizer for parties (for all age groups). It is also a quick “go to” meal for a weeknight dinner. Simple and delicious, what more can you ask for? If you have any leftovers, this chicken (chopped up) makes a fantastic chicken & grilled cheese sandwich on day two.
6 boneless, skinless chicken breast halves
2 cup of buttermilk
1 teaspoon garlic powder
2 cups flour
2 eggs, beaten
1 teaspoon salt
½ teaspoon black pepper
½ teaspoon onion powder


Combine the buttermilk, beaten egg and garlic powder and pour it into a large Ziploc bag. Cut the chicken breast into long half inch wide strips and put them in the same Ziploc bag. Refrigerate this until you are ready to cook (or at least 2 hours). In another large Ziploc bag, combine the flour, salt, pepper and onion powder.

When it is time to cook, follow these steps:
1. Drain chicken (saving liquid) and coat chicken in flour mixture.
2. Shake off excess flour mixture and put BACK INTO liquid again.
3. Repeat step one, then THROW AWAY BUTTERMILK LIQUID
Fry chicken fingers in ½” vegetable oil until golden. Keep warm in oven.
photo

BARBEQUE DIPPING SAUCE
1 cup ketchup
¼ cup white vinegar
½ cup brown sugar
2 tablespoons chopped onion (sautéed)
1 teaspoon Worcestershire sauce
½ teaspoon liquid smoke
¼ teaspoon black pepper
¼ teaspoon celery salt
½ teaspoon powdered mustard
Combine and simmer slowly for about 10 minutes.


We like barbeque flavored Chicken Fingers. To do that, I simply put one half cup of barbeque into a large frying pan, let it heat up. Then I put the cooked chicken fingers in the sauce and toss lightly.

NOTE: Personally, we like this recipe best with boneless, skinless chicken thighs because they are so moist. This is also excellent with chicken tenderloin pieces.

Wednesday, April 15, 2009

EASY CHEESY CHICKEN WRAPPED IN SPINACH TORILLAS

This is a very quick, satisfying and easy-cheesy chicken meal that the whole family will love. It is also a great “go to” recipe when you have unexpected guests for dinner. It also reheats well.

1 tablespoon olive oil
1 medium onion chopped
(1) 4½ ounce can of chopped mild green chilies
pinch of crushed red pepper flakes
½ cup sour cream
3½ cups of cooked chicken (chopped or shredded)
black pepper to taste
(8) 8” spinach flavored tortillas
4 cups Monterey Jack cheese shredded (divided)
1 can of cream of chicken soup
¼ cup of chopped onions
¼ cup chopped celery
¼ cup chopped carrots
2 heaping teaspoons of chicken bullion granules
1½ cups of half & half
¼ teaspoon black pepper

Sauté the chopped onion in the olive oil for about 5 minutes; add the chilies and red pepper flakes and sauté for 1 more minute. Add the sour cream, chicken pieces and 2 cups of the Monterey Jack cheese.

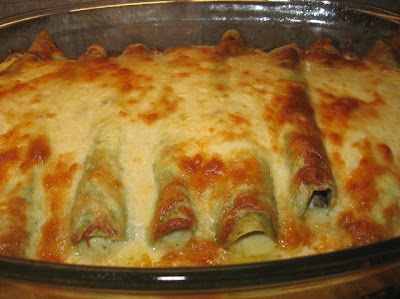
Spoon 2 big spoonfuls of chicken-cheese mixture onto the tortilla (dust lightly with black pepper) and roll up. Place, seam side down in lightly greased 9x13 baking dish.

Saute ¼ cup finely diced onion, ¼ cup finely diced celery and ¼ cup finely diced carrot until almost tender. Whisk the sauted veggies, bullion, half and half and pepper into the cream of mushroom soup until smooth and lump free. Pour over the chicken wraps and cover with remaining 2 cups of cheese. Bake at 350° for 45 minutes or until cheese is bubbly and brown. Let chicken wraps sit for a few minutes before you try to cut them.
NOTE: A whole pre-roasted deli chicken (cut into pieces) works great for this recipe.
NOTE: If I have the time, I put 4 chicken breasts into the crockpot along with a box of
chicken broth (not bullion) and some onions and celery and let it cook on low overnight. The next morning, I put the chicken into the fridge and save the chicken stock for soup or another dish (it freezes well). The super tender chicken pulls apart easily to make this enchilada dish.

Saturday, January 24, 2009

CHICKEN BROCCOLI MUSHROOM BRAID


This recipe is great for a buffet table or something like a baby shower because it can be sliced into small sections...it tastes good even after it's cooled to room temperature and the braided effect of the dough looks pretty.

2 cups cooked chicken shredded (deli rotisserie chicken works well too)
½ cup red bell pepper diced finely
1 cup cheddar cheese shredded
¼ cup onion diced
2 cups chopped mushrooms
1 cup fresh broccoli, chopped
1 glove garlic (crushed)
¼ cup mayonnaise
¼ tsp. salt
(2) 8 oz. refrigerator crescent rolls (** see note)
1 egg white beaten
Sauté veggies and garlic just until tender. Add the rest of the ingredients (except the rolls) mix well and set aside. THIS NEXT PART SOUNDS COMPLICATED BUT IT IS NOT!!
Unroll ONE TUBE of crescent roll dough and pinch triangle seams together to make one big triangle (roll dough with roller to flatten and thin it a little). PLACE DOUGH ON BAKING SHEET BEFORE YOU TOP DOUGH WITH FILLING. Spoon HALF of the filling down the center of the dough. Lightly salt and pepper filling. On both sides of the filling, cut the dough in 1” strips (but don’t come too close to the filling. Pull the strips over the filling in a criss-cross fashion, pinching together where necessary. Brush dough top with egg white. Bake in preheated oven for 25-28 minutes or until golden brown, sprinkle with Parmesan cheese.
Slice & serve. REPEAT WITH SECOND TUBE OF CRESCENT DOUGH.

*NOTE: When I make this for a larger group, I double the filling and (instead of the crescent roll dough) I use bead dough. Personally, I like the crescent roll variation better (because I like less bread), however the photo I've used here was done with bread dough.

Search This Blog

Popular Posts

Like This

 
Copyright © 2011. Area Information: CHICKEN RECIPES . All Rights Reserved
Company Info | Contact Us | Privacy policy | Term of use | Widget | Advertise with Us | Site map
Template modify by Creating Website. Inspired from CBS News