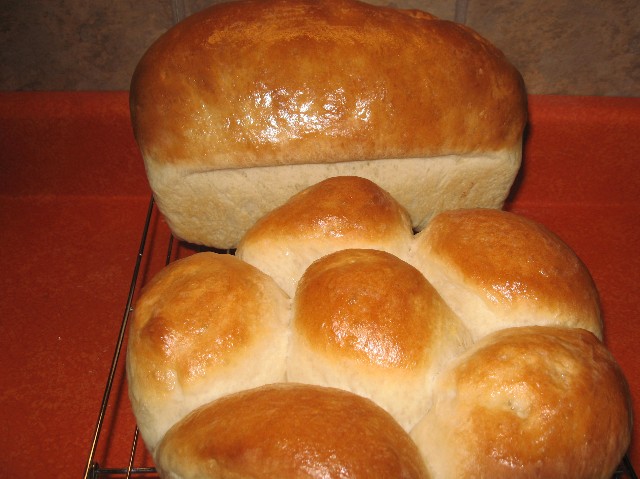
Showing posts with label BREAD RECIPES. Show all posts

Monday, December 3, 2012

EASIEST BREAD STICKS EVER !!

EASIEST BREAD STICKS EVER !!

In the bowl of a stand mixer, put

  • 2/3 cup warm milk
  • 2 tablespoons sugar
  • 2 teaspoons of yeast

Stir it up just a little (with a spoon), then add

  • 1 tablespoon + 2 teaspoons butter (room temperature)
  • 2 cups flour
  • 1 teaspoon salt

Put your paddle blade on, and mix for three minutes on medium low speed, it should look like this (the walls of the bowl should be clean)

Take the dough out of the bowl and spray the bowl with some vegetable spray and put the dough back in. Cover with plastic wrap and then a dish towel, and let it raise for an hour. It won't get huge because there is only 2 cups of flour, but it should be nice and puffy


Divide the dough into 8 pieces and roll them out to (about) the diameter of your thumb.  Place them on a parchment lined cookie sheet (or just a lightly greased sheet) a few inches apart and lightly spritz them with vegetable spray. Cover them with plastic wrap and gently lay a THIN kitchen towel over the plastic wrap.

Let them raise for about an hour, then remove the plastic wrap and bake them in a pre-heated 375 oven for 10 to 15 minutes or until they are golden brown, then remove them and brush them with butter. Some times I brush them with butter and then roll them in Parmesan....Mmmmmm.

Serve hot!!


NOTE: I'm sure this recipe would work very well in a bread machine as well.

Saturday, December 1, 2012

HOME MADE PANKO CRUMBS

Panko (breading) crumbs are the absolute best for many, many recipes. I recently used them to turn "ho-hum" shrimp into "wow, these are good" shrimp.  I've heard of people using them in meatloaf and meatballs (I haven't tried that yet) as well as a jillion other recipes.

My biggest problem with panko bread crumbs is that they can be expensive AND they are not something I routinely keep in my pantry.  That's why I was thrilled to make this discovery!!

Panko bread crumbs are different from standard bread crumbs because they are a made from shredded bread.  With that in mind, I froze 4 slices of regular (cheap) sandwich bread; I cut the crusts off and cut the remaining "squares" of sandwich bread in half.  I then stacked them up and fed them through the SHREDDER in my food processor.  This is what they looked like:

They were light and fluffy, just like commercial Panko crumbs!!

I then sprinkled them evenly over a dry cookie sheet, gently spreading them as thin as I could and baked them in a pre-heated  300° oven for about 10 minutes (gently stirring every 2 minutes or so).  Actually, they were dry in 8 minutes, but I let them stay in their for a couple more minutes to be sure.  Just don't let them turn color.

This "recipe" will make about 1½ cups of crumbs, so if you double the recipe, make sure you bake it on two cookie sheets so the crumbs can spread out and dry properly.
I'm thinking of making whole wheat panko crumbs next!!

Wednesday, May 9, 2012

INDIVIDUAL YORKSHIRE PUDDINGS

On VERY special occasions, my British mother used to make roast beef with Yorkshire pudding. She baked the pudding in a 9" x 9" pan and I can still picture the huge golden "puff" coming out of the oven. Of course, it always collapsed by the time she brought it to the table, but we all thought it was SUPPOSED to look like that and we eagerly dunked chunks of the tasty treat into mom's deliciously perfect beef gravy; Mmmmmm, I can still taste it.

Recently, I decided to make a couple of changes to my Yorkshire pudding recipe. First, I made them into individual puddings and secondly, I decided to serve them with roast chicken and gravy, so I added a little poultry seasoning and onion powder  into the batter; what a nostalgic treat!!

 This recipe is fool proof as long as you follow it closely.

The cooking times for these individual Yorkshire puddings work well if you bake them in one of those over-sized cupcake pans, I believe they are called Texas size muffin pans; a popover pan will work well also. If you use a standard cupcake pan, you'll have to reduce the cooking time.

Put your UNGREASED pan in a COLD oven and then preheat the oven and pan to 425.

While your oven/pan is preheating, whisk together:

3 eggs
¼ teaspoon salt
¼ teaspoon onion powder (not onion salt)
½ teaspoon poultry seasoning  (if you use chicken gravy)
1 cup of milk (see note)
1 tablespoon melted butter

NOTE: If I have whipping cream, I put about ¼ cup of whipping cream in a measuring cup and then fill the rest of the way with 2% milk...if I have no cream on hand, I just use 1 cup of 2% milk.

After the above ingredients are whisked together well, add one cup of all purpose flour (spoon flour into measuring measuring cup and level off with straight edge). Whisk everything together until it looks very smooth and creamy. Let batter sit at room temperature while your oven preheats.

Working quickly (so your pan doesn't cool off) take your pan out of the hot oven and spray each cup with vegetable spray. Put a small chunk of COLD butter (roughly ½ teaspoon but the exact size is not crucial) (see note below) into the bottom of each hot cup (don't wait for it to melt). Fill each cup half way full.

Bake at 425 for 20 minutes. After 20 minutes, turn the oven down to 325 (don't open the oven door) and bake for another 15 minutes. Remove puddings from pan and poke a tiny hole (I use a toothpick) in the bottom of each popover to relieve a little steam (not totally necessary if you are going to eat them right away).

The inside of the Yorkshire pudding is full of light batter with holes, which is perfect for holding butter and gravy.

NOTE: Traditionally, you are supposed to pour the batter over hot beef fat  in the bottom of each muffin cup, however, I couldn't bring myself to do that (and besides I was serving them with chicken), so I used butter and it works great.

NOTE: If you are serving these with roast beef, omit the poultry seasoning and add whatever seasoning you like.

NOTE: This recipe makes six generous Yorkshire puddings.

Saturday, April 28, 2012

SUNDAY MORNING FLUFFY BISCUITS

I have been biscuit "challenged" for many years, so when I'm in a hurry, I usually resort to a tube of commercial rolls and try to jazz them up, but they are pretty unmistakable (and getting expensive!!). 

The last few years, I've tried out a lot of biscuit recipes, in hopes of finding the perfect one; one that is flavorful, light, fluffy and EASY............here is my latest success...YUM!!!

Made with baking powder, baking soda, buttermilk AND yeast, these biscuits are light and fluffy. Hot out of the oven with butter and honey, they are a winner!!!

In a small bowl, mix 1 packet of dry active yeast, a pinch of sugar and ¼ cup of warm water (set aside). After a few minutes, it should be foamy like this:
2½ cups of all purpose flour
½ teaspoon baking soda
1½ teaspoon baking powder
½ teaspoon salt
1 tablespoon of white sugar
6 tablespoons Crisco flavored shortening
1 cup buttermilk (see note)

Stir dry ingredients together and then cut in the shortening until it is about the size of small peas. Stir in the dissolved yeast and buttermilk. Mix well, but do not over mix. Turn out onto floured board and roll to ¾” thick. Cut with a 3” biscuit cutter. Place on parchment paper and bake in preheated 400° oven for 12-14 minutes or until nice and golden. Brush with melted butter when they come out of the oven; they make fantastic breakfast sandwiches!!

NOTE: No kneading needed.

NOTE: This recipe does not work as well if you use butter instead of shortening. I use butter flavored Crisco in all my recipes that call for shortening.

NOTE: Don't be tempted to use your food processor when cutting in the shortening, it will process the shortening to much, it is better to have larger pieces of butter than super fine. I use my pastry cutter.
NOTE: Do NOT add all of the buttermilk at once. Add about 2/3 of it and see if that is enough. Personally, I think 1 cup of milk is too much, but everyone’s flour is different. Just flour your board enough so that the biscuits are not sticky.

NOTE: If you don’t have parchment paper, spray your pan with vegetable spray.

NOTE: Don’t use a twisting motion when you are cutting your biscuits. It seals off
the edges and they won’t raise very high.

Sunday, February 12, 2012

CHEESE PUFFS

Your guests will think you are a whiz in the kitchen when you serve these cheese puffs, but they are quick and easy to make and oh so good!!

Made from a basic cream puff dough and grated cheese, these bite size treats are FULL of air pockets and have a crispy-cheesy outer crust.  You can eat them right out of the oven, or get imaginative and fill them with anything savory.

1 cup milk
4 tablespoons unsalted butter
¼ teaspoon salt
pinch of cayenne pepper (or more if you like)
1 cup all purpose flour
3 large eggs at room temperature
½ teaspoon paprika (not the spicy kind)
½ cup grated Parmesan cheese (not the powdered kind)
1½ cups grated Gruyere cheese (see note)
coarse salt to sprinkle on top (see note)

Combine the milk, butter, ¼ teaspoon salt and cayenne in a saucepan and bring it to a boil. Once it starts to boil, remove it from the heat and add the flour all at once (mixing like crazy with a sturdy spatula) until the mixture comes together like this:
Return the pan to the heat and cook over medium heat for about a minute to dry out any excess moisture (stirring).

Remove from heat and put into a food processor and let it cool for five minutes. After the five minutes, process the dough for about 5 seconds. Add the paprika and eggs (one egg at a time) mixing well after each egg.

Remove from food processor and let dough cool for about 10 minutes. Mix in grated cheese and stir just enough to mix well.

Using a measuring tablespoon, scoop out a LEVEL TABLESPOON of the dough and push it off of the spoon (with your finger) onto a parchment paper lined baking sheet (try and keep the puffs as round as possible (but it isn’t critical).

Place them about 2” apart. Top each puff with a pinch of Parmesan and just a mini-pinch of coarse salt (see note below). Bake at 375° for 30 minutes (watch them the last 2 or 3 minutes so they don’t get too dark).

Serve warm or at room temperature. Just as soon as they come out of the oven, pierce the side of the puff with the tip of a small knife (to let any steam escape), this will keep them crispy longer.

Click on this photo to get a better look at the interior of the puffs

 NOTE: Make sure you have everything ready to go before you start making these puffs (cheese grated, flour measured, etc.) so that the liquid volume doesn’t boil away while you are grating your cheese, etc.

NOTE: Let the batter cool a little before you add the eggs so they don’t cook when they hit the hot dough.

NOTE: Lets talk about cheese. You can use any cheese you want but your results will vary significantly, depending on what kind you use.  The dough will puff up best when you use a hard, dry cheese.  If you use a wet cheese, like cheddar, your puffs MIGHT try to deflate when you take them out of the oven. They will still taste good, but they might not be crispy.

NOTE: If you are going to use the traditional Gruyere cheese…note that there are several different kinds of Gruyere. You want the dry hard one, not the semi-soft one.

NOTE ABOUT SALT: The recipe calls for a pinch of coarse salt on the top of each puff, but we don’t care for that…the Parmesan and Gruyere are pretty salty already.

This sounds like a lot of hassle, but once you make these, you will see that they are a snap and I have only one warning…they are addictive!!

Friday, November 18, 2011

EASY DINNER ROLLS

This recipe is just in time for Thanksgiving and could not be easier. The dough goes together in the stand mixer and only raises once. The rolls reheat very well, so you can even make them the day before Thanksgiving and just heat them up for the big dinner.
2 cups all purpose flour (divided) (see note)
1 envelope dry active yeast (I use 1 tablespoon)
2 tablespoons sugar
½ teaspoon salt
½ cup milk
¼ cup water
2 tablespoons butter

Mix ¾ cup flour, yeast, sugar and salt in the bowl of your stand mixer.  Heat the milk, water and butter in the microwave for about 30 seconds, or just until it is "baby bottle warm". Add it to the flour mixture and beat with mixer for 2 minutes.

Add another ¼ cup of flour and beat on high for another 2 minutes. Stir in enough of the remaining flour to make a soft dough. NOTE: This recipe calls for 2 cups flour (total), but it takes me 2½ cups. Since the moisture content of flour is always different (brand to brand and climate to climate), I suggest that you put in the 2 original cups of flour and then see how the dough looks. If it's still very sticky, add a little more flour.

Knead the dough (with dough hook or by hand) for about 8 minutes; at the end of 8 minutes, the dough should come away from the sides of the bowl cleanly.

Cover with plastic and let it rest for 10 minutes.  Divide dough into 12 pieces and shape into balls.  Place in greased cupcake pans. Mist the top of the rolls with vegetable spray and cover loosely with plastic. Let rise until double (this dough rises very quickly and it only took them 30 minutes to rise).

Bake at 375 for 16 to 20 minutes or until golden brown. Brush with butter when then come out of the pan. Serve hot.

NOTE: You can partially bake these (for about 10 minutes) just like brown and serve rolls. If you do that, I suggest you freeze them and then pop them into the oven to finish baking, just before dinner.

Tuesday, November 8, 2011

EASY ENGLISH MUFFINS

I have always loved English muffins; I love all of the nooks and crannies that hold creamy butter and jam or a dab of melting peanut butter. They are very easy to make and they make wonderful breakfast sandwiches (they freeze well too!!).
2 packets dry active yeast (I use 2 tablespoons)
½ cup warm water
½ cup warm milk
¼ cup canola oil
1 egg
3 tablespoons honey
2 cups all purpose flour
1 whole wheat flour
1 cup raisins
1 teaspoon salt

Mix the flours, salt and raisins together and set aside. Whisk the egg into the cold milk and then add the water, oil  and honey. Warm this mixture in the microwave for a few seconds to take the chill off (bring it to the same temperature you would for a babies bottle). Stir in yeast and let it sit for about 5 minutes.

Pour this mixture into a stand mixer (can be done by hand also) and add the dry ingredients. Knead this dough for about 5 minutes or until the dough comes away from the sides of the bowl cleanly. Cover with plastic wrap and let it sit in a warm place for an hour. Dough should double in size.
Turn dough out onto counter (I do not flour the counter) and roll to ½” thickness. Cut muffins with a 4” cutter (or drinking glass). Place each muffin on a square of wax paper to rise. This will help you transfer the muffins to the frying pan. Let the muffins raise for an hour before you cook them.
The muffins are cooked on a DRY electric frying pan (no grease) or a cast iron skillet. The recipe does not say specifically what temperature to cook them at, it just says medium low for 7 minutes each side. I have found that they cook nicely at 300° on my electric griddle. Serve warm right from the frying pan or  cool on a wire rack and then slice in half and toast.
NOTE: Since everyone’s frying pan and stove temperatures are different, I suggest you try a single muffin and see how quickly it browns before you cook the whole batch.
NOTE: Hold onto the edges of the wax paper square as you gently lift the raw muffin from the counter. Turn the muffin over and gently peel of the wax paper and gently lay the raw muffin on the griddle.

NOTE: Do not grease the frying pan, they will NOT stick. If you are worried about it, or if you don't have a good non-stick pan, you can use a light sprinkle of corn meal on the cooking surface.

Wednesday, April 20, 2011

SWEET DINNER ROLLS FOR EASTER

This is an "oldie, but a goodie" recipe for a sweet, buttery, dinner roll for your Easter holiday. This recipe can be made ahead of the holidays, partially baked and then just tossed in the oven, to finish baking, just before the big dinner. They are delicious, easy to make and freeze beautifully.
½ cup warm water
1/3 cup white sugar
1 teaspoon salt
½ cup warm milk
1/3 cup soft butter
1 package of dry yeast (see note)
1 egg (room temperature if possible)
3¾ cups all purpose flour

Heat the water and milk until warm (I use the microwave). Put it into the large bowl of a stand mixer and stir in the sugar and yeast. Let it sit for about 10 minutes (it should get foamy). After 10 minutes, add the salt, butter, egg and 1 cup of flour, mix well.

Continue adding the rest of the flour, ½ cup at a time. Stop your stand mixer every once in a while and scrape down the inside of your bowl and turn the entire dough mixture over (this insures that all of the flour gets mixed in completely & evenly).

Remove the dough from the bowl and spray the bowl with cooking spray. Return the dough to the bowl and spritz the top of the dough (a little) with more cooking spray (so the plastic wrap doesn't stick to the dough). Cover the bowl with plastic wrap and place in the warmest part of your kitchen for an hour to raise. Keep in mind that marble counters are not the warmest place to keep your bowl of dough.

After an hour, or after the dough has doubled in size (whichever comes first), push the air out of the dough with your hands. Roll out 12" "ropes" of dough and tie a knot in the middle, like this:

To complete the "knot", tuck one loose end under the roll and bring the other loose end over the top and tuck it inside of the original knot, place in greased muffin tins. They will look like this:
Spritz the top of the rolls with (just a little) cooking spray and cover with plastic wrap again. Let them raise until they are double in size (35-45 minutes).

If you want to partially bake them (they will be like brown & serve rolls), bake in a preheated 325 oven for 10 minutes. Remove from pans and cool completely (then freeze). When it is time to use them, defrost them for about 15 minutes, then bake in a preheated 375 oven for about 8-10 minutes.

If want to bake them right away (after they have risen in the pans), bake in preheated 350 oven for 12-15 minutes (depending on how hot your oven runs, just keep an eye on them after 12 minutes).
NOTE: I buy bulk yeast, so, when a recipe calls for a package of yeast, I just use a tablespoon (that is a little extra, but works well).

Thursday, February 3, 2011

THE ULTIMATE POPOVER

I have been playing around with popover recipes for a while now, so I thought I would "get serious" and buy a popover pan. The pan makes a huge difference, not so much in the taste, but in appearance and how big the air bubbles are inside of the popover. These popovers could not be easier or cheaper to make, and they are such a treat, hot out of the oven with honey butter or strawberry jam!! If you do not have a popover pan, see note at the end of this post.

This recipe is fool proof as long as you follow it closely. Preheat your oven to 425 degrees. I put my popover pan in the oven while it preheats (do not grease before you preheat).
While your oven/pan is preheating, whisk together:
3 eggs
¼ teaspoon salt
1 teaspoon vanilla
1 cup of milk (see note)1 tablespoon melted butter

NOTE: If I have whipping cream, I put about ¼ cup of whipping cream in a measuring cup and then fill the rest of the way with 2% milk...if I have no cream on hand, I just use 1 cup of 2% milk).

After the above ingredients are whisked together well, add one cup of all purpose flour (spoon flour into measuring measuring cup and level off with straight edge). Whisk
everything together for about 30 seconds or until it looks very smooth & creamy.

Take the popover pan out of the hot oven and spray each cup with vegetable spray. Put a small chunk of chilled butter (roughly ½ teaspoon but the exact size is not crucial) into the bottom of each hot cup. Fill each cup half way full (makes six big popovers).

Bake popovers at 425 for 20 minutes. After 20 minutes, turn the oven down to 325 and bake for another 15 minutes. Remove popovers from pan and poke a tiny hole (I use a toothpick) in the bottom of each popover to relieve a little steam (not totally necessary if you are going to eat them right away).


NOTE: If you do not have a popover pan, you can use 6 ounce (oven safe) custard cups (I used the clear Pyrex ones, for a long time, with great success). I placed them all on a cookie sheet for easier handling. The popovers will not get quite as tall (as they do with a popover pan) but they taste every bit as good.

Someone from outside the USA wrote and asked me what a popover pan was, so here is a photo. As you can see, it is almost like a cupcake pan, but the cups are a lot deeper and spaced far apart so the hot air can circulate around each cup.

Friday, September 24, 2010

3 MINUTE MICROWAVE CORNBREAD

When I first found this little recipe, promising fresh corn bread in 3 minutes, I thought "no way". I'm here to tell you "yes way"...it is excellent!! You won't get the brown crunchy part of corn bread that a lot of people love, but the taste and texture is surprisingly good and when you weigh the benefits of serving hot corn bread in 3 minutes, well...I will definitely be using this recipe often!!
2 tablespoons vegetable oil
½ cup milk
1 egg
½ teaspoon vanilla
½ cup white flour
½ cup corn meal
2 tablespoons white sugar
2 teaspoons baking powder
¼ teaspoon salt

Mix everything with a whisk and pour into a greased microwave safe baking dish. I used a 6½ x 6½ x 2 baking dish. Microwave on high for 3 minutes. If your microwave doesn't have a carousel, then manually rotate the dish half way through the cooking cycle. NOTE: I used a 1000 watt microwave and it took exactly 3 minutes. If your microwave is different than that, you may have to adjust the cooking time.

NOTE: I used cooking spray inside of the baking dish and the cooked corn bread removed very easily.

Friday, January 8, 2010

THE BEST BANANA-PINEAPPLE BREAD I'VE EVER EATEN!!

I've tried, literally, dozens of banana bread recipes, over the years, and this one is, by far, the BEST I've ever eaten. It is quick and easy (one bowl); it is moist from the 2 cups of mashed bananas and some crushed pineapple, it is sweet from brown sugar & has just a hint of cinnamon and coconut extract. You have to try this one!!
In a large bowl, whisk together:
3 large eggs
1¼ cup canola oil
2 teaspoons vanilla extract
1 teaspoon coconut extract (don't leave out)
2 cups of ripe mashed bananas
1 (8 ounce) can crushed pineapple drained
2/3 cup brown sugar, packed
1 cup white sugar

After it is well mixed, stir in:
3 cups all purpose flour
1 teaspoon salt
1 teaspoon baking soda
1½ teaspoon ground cinnamon
1 cup chopped pecans

Mix well with wooden spoon and pour into two greased 8" x 4" x 2" loaf pans. Bake at 350F for 60 minutes or until toothpick tests clean. Cool in pan for 20 minutes before removing to wire rack. Wrap hot banana bread in plastic wrap and let it cool.

Hubby loves this bread toasted & slathered with butter!!

Tuesday, November 24, 2009

WHIPPING CREAM BISCUITS

I am fairly successful when it comes to baking with yeast, however, biscuits have been one of my big failures for many years. Every so often, I try various biscuit recipes in hopes of finding a good one. After each attempt, Hubby tells me "I like whomp biscuits" better. Are you familiar with "whomp biscuits"? They go "whomp" when you hit them on the edge of the counter to pop the tube open. Personally, they aren't my favorite, but Hubby likes them (Pillsbury Grands).

Last week, I made Paula Deen's cream biscuits for breakfast. Because the recipe has only THREE ingredients (self rising flour, sugar and whipping cream), I didn't have very high expectations, but they turned out GREAT!! The biscuits were light, moist, tasty and oh so quick. I used them to make some ham & egg sandwiches and Hubby actually liked them!!

2 cups self rising flour (see note)
1 tablespoon sugar
1½ cups heavy whipping cream


Mix all 3 ingredients together until dough forms a ball. Turn out onto lightly floured counter and knead 5 to 7 times. Pat dough out to ½ inch thickness and cut biscuits with a 3 inch cutter. Place on greased baking sheet (with 1" between biscuits) and bake at 500F for 10 minutes

NOTE: I never have self rising flour, so for EACH CUP of self rising flour, I substitute 1 cup of all purpose flour + 1¼ teaspoon baking powder + 1/8 teaspoon salt.
NOTE: I brushed my biscuits with butter when them came out of the oven.

Friday, October 30, 2009

BASIC FOCACCIA BREAD -- TRY IT THIS WEEKEND!!

Today, when hubby asked what we were having for lunch, I told him turkey panini's. He got one of those proud grins on his face, that told me he was getting ready to make a wisecrack; then he told me he didn't know turkeys HAD panini's. He can be delightfully goofy. If I had been prepared for his menu question, I would have just said "grilled turkey sandwiches" and he would have said great; I think it is just the word panini that he was struggling with.Todays grilled/panini sandwiches were made with a no-frills basic focaccia bread. For those of you who are still getting familiar with yeast doughs, this would be an excellent recipe to try; it is a very easy one and the results are fantastic.
Turkey and Smoked Gouda Panini
2¾ cups all purpose flour
1 teaspoon salt
1 teaspoon white sugar
1 tablespoon dry active yeast
1 clove garlic minced
½ teaspoon black pepper
2 tablespoons olive oil (divided)
1 cup warm milk

Mix the first six ingredients together in the bowl of a stand mixer. Mix in warm milk and one tablespoon of olive oil. Mix well and knead until the dough is smooth and elastic (it only takes a few minutes). Cover with plastic and let it sit in a warm place for an hour. Push all of the air out of the dough and place it on a greased baking sheet. Pat the dough into a ½" thick rectangle and brush with the remaining one tablespoon of olive oil. Cover the rectangle very loosely with plastic wrap and let it sit for 30 minutes (it will raise a little, but not a lot). After 30 minutes, make dents in the dough (with your fingertips) every few inches over the entire surface of the focaccia. Bake at 450 for 15 minutes or until lightly golden. Cool the focaccia completely before slicing it horizontally to make sandwiches.

NOTE: This focaccia is basically a blank slate; you can add anything you like to the dough. If you want an herb focaccia, add 1 teaspoon each of dried oregano, dried thyme and dried basil to the first stage of the dough. If you want a cheesy focaccia, top the dough with a cup of shredded mozzarella and 2 tablespoons grated Parmesan just before baking.
NOTE: I've been using my GF Grilling Machine to make panini's by setting a large heavy can of something on the closed grill top (to weight the sandwich down). It works very well.
JUST FOR SMILES: When I ran spell check on todays post, it tried to change the word focaccia to cow catcher...how funny is that??

Tuesday, October 27, 2009

MINI-BRIOCHE ROLLS

I make these rolls about twice a month and freeze them (fully baked) in a high quality freezer container. A frozen baked roll takes about 4-5 minutes (at 350) to reheat. They are also very handy for the holidays because they are more festive than standard dinner rolls and since they are already fully baked, you can just pop them all in the oven five minutes before dinner.

3½ cups all purpose flour
2 tablespoons dry active yeast
½ cup warm milk
1/3 cup white sugar
1 teaspoon lemon zest
4 eggs at room temperature
½ teaspoon salt
2/3 cup unsalted butter at room temperature

In a large mixing bowl, combine 1½ cups of flour, sugar, yeast, zest and salt. In a saucepan (or microwave) heat the butter and milk to 120 to 130 degrees. Add the warmed liquid ingredients to the dry ingredients (stirring quickly with wooden spoon). Add the room temperature eggs and mix well; add one more cup of flour and beat until smooth. Stir in the rest of the flour, but do no knead the dough. Put the dough in a greased bowl and cover and let it raise in a warm place for about an hour. After an hour, push all of the air out of the dough and cover and refrigerate it overnight. (see note about rising times)

The next day, push any air out of the dough and turn it out onto a lightly floured counter; let it rest for 30 minutes (with inverted bowl over it).

If you want the traditional brioche shape, divide the dough so that you have 1/6th (for the little top knots) and divide the rest of the dough into 12 pieces. Roll the larger pieces into a ball and place in individual brioche pans (or cupcake pans) and make a dent in each one. Roll smaller balls (from the 1/6th portion) and set them on the indentation. Lightly spray the rolls with cooking spray (very lightly) and cover with plastic wrap. Let these raise in a warm place for one to two hours or until they are double in size. Gently brush the rolls with egg wash and bake at 375 for 15-18 minutes or until golden. Place a pan of water on the bottom rack of the oven while the brioche bake.

NOTE: I don't make the traditional brioche shape. I roll 12" "snakes" and then tie them in knots, tucking in the loose ends.
NOTE: I don't use an egg wash on mine because they get too crusty when I reheat them. I bake them without the egg wash and just brush them with a little butter when they come out of the oven the first time.
NOTE: Keep in mind that if you have granite counter tops, it is going to take longer for your dough to raise because they are so cool.

Saturday, October 17, 2009

BASIC WHITE BREAD

I've been making this bread recipe for nearly 40 years and it has never failed me. It is a basic white bread that goes together in minutes (I make this recipe about once a week). It is fool proof and a great recipe for beginning bread makers.


5 cups all purpose flour
3 tablespoons granulated sugar
1 tablespoon table salt
2 envelopes of active dry yeast
3 tablespoons vegetable oil
2½ cups very warm water

In the bowl of a stand mixer, place 2 cups of all purpose flour, 2 packets of dry active yeast (I use 2 tablespoons because I buy it in a larger jar), 3 tablespoons of granulated sugar, 1 tablespoon of table salt and 3 tablespoons of vegetable oil (I use canola oil). Stir together
NOTE: Normally, most yeast recipes have you dissolve the active dry yeast in water that is 110 degrees before you add it to the flour. However, 99.9% of the time I do not do it that way. If you mix the dry yeast into the dry flour, you can add even hotter water because the flour will cool down the water before it can damage the yeast. That may sound complicated, but it isn't. The warmer water will jump start your yeast and your dough will raise faster with this method. It works so well that it is the only way I make bread (I use water that is 120 degrees). You can use an instant read thermometer to check the temperature of your water (when you first start to work with yeast) although you will quickly learn what temperature the water is by just holding your hand under the faucet.
Stir 2½ cups of 120 degree water into the flour mixture and stir vigorously with a wooden spoon while you pour. Let this mixture sit for about 10 minutes.


Add the rest of  the flour (half cup at a time) beating well in between. When the dough gets too hard to mix with your spoon, attach your dough hook to your stand mixer and turn on low.

Now here's a tip: when making dough, at this stage, something called "dough shag" is (can be) your enemy. If you add too much flour, too fast, you will get "dough shag" or shaggy pieces of dough.
In the next photo, see the dry white sections/layers next to the wet dough? That's called shag,
Click on the photo to see the shag more clearly
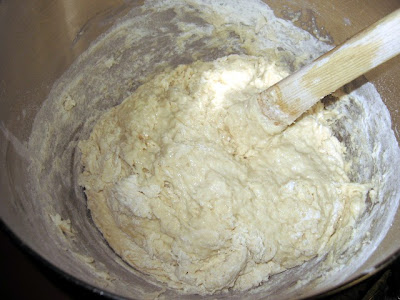
Shag is not totally a bad thing, it is just a clue that it is NOT time to add more flour. NEVER ADD MORE FLOUR IF YOU CAN SEE SHAG. Here is another photo, see the shag?
 I intentionally added the flour a little too quickly so you could see this effect.
Click on photo

Don't panic if you see shag, just keep "kneading" with your dough hook (or by hand) and the shag will eventually incorporate into the wet dough. Don't add more flour until it looks more like this:
Eventually, you will get all 5 cups of flour into the dough. When that happens, let your machine knead the dough (gently, on a low setting) for about 6-8 minutes. Stop you mixer every once in a while and pull all the dough off of the dough hook, scrape down the walls of your bowl and turn the ball of dough completely over and start the mixer again. You will have to do this a few times until the shag totally disappears and the dough clings together in a nice semi-solid "lump".

At the end of 6 to 8 minutes (exact time is not crucial), the dough should have worked itself into a smooth ball that stays on the dough hook when you raise the hook out of the bowl. The interior sides of the bowl should be fairly clean. It should look like this:

See how the dough ball has "cleaned" all of the little bits off of the bottom and sides of the bowl? This is what you want to see. The dough will not be sticky and it will feel like play doh when you touch it. If the dough is too soft, it will pull itself off of the dough hook. If that happens, add another quarter cup of flour and knead it a little longer.

Remove your dough from the dough hook, form it into a ball and place it in a greased bowl (I use Pam). Spray the top of the dough with a little Pam, and cover it with plastic:
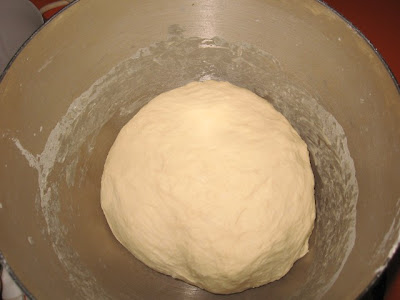
Place this covered bowl of dough in a nice warm place in your kitchen. Room temperature is OK, but if you have a warmer place (less than 100 degrees) place it there. After an hour, your dough will have risen substantially, (hopefully doubled in size).
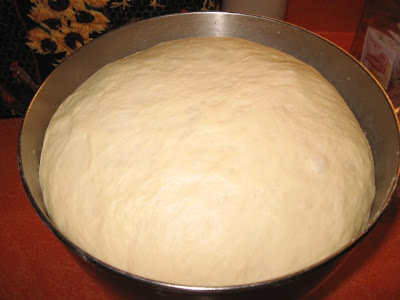

Your risen dough should look like this

When the dough has fully risen, turn it out onto your counter (some people say flour the counter at this stage, but I NEVER do) and push all of the air out of the dough. Cover it with an inverted empty bowl and let it sit for 15 minutes to relax (this will make your dough much easier to work).

Depending on how you want to shape your dough, follow these general directions, but use your imagination. For a loaf of bread, depending on the size of your loaf pan, this recipe will make 2 or 3 loaves. If you are using a big loaf pan, cut the dough in half. Roll it out into a large rectangle and then roll it up, pinching the ends shut. Place in greased loaf pan. spray the top of the dough with a spritz of cooking spray and cover loosely with plastic wrap. Let raise for an hour or until doubled in size.

If you are making rolls, just pinch off pieces about the size of a plum and roll them into a ball. Place in a greased baking dish (touching each other) and spritz the top with a little cooking spray and cover with plastic wrap. Let raise for an hour or till doubled in size.

I also make hamburger buns with this recipe (makes about 2 dozen). Once baked, they freeze well and I find myself using them for everything from burgers, to breakfast sandwiches, to peanut butter sandwiches.

Bake the loafs in a 400 degree preheated oven for 25 minutes. Remove from pan immediately. Bake rolls (and burger buns) at 400 for about  16-18 minutes, remove from pan immediately.
NOTE: Yeast comes in little envelopes ¼ ounce envelopes (2¼ teaspoons per envelope). However, I buy yeast by the jar, so I always just use a tablespoon of yeast (3 teaspoons). Any dry active yeast will work.

NOTE: You will have much more success in your bread making if you understand that the amount of flour that goes into a recipe varies from day to day. Many serious bakers weigh their flour, but I find that keeping a close eye on how the flour is "behaving" works better than weighing. On a humid day it may take an extra tablespoon, on a rainy day a tablespoon less. So be stingy with that last half cup of flour until you see how the dough acts in YOUR climate. Keep in mind that the less flour you use, the more moist your bread will be.

NOTE: A lot of people have granite counter tops which are always cool to the touch. This will effect the length of time your bread takes to raise. I suggest that you find a warmer place to let your bowl of dough raise than on the granite.


Wednesday, October 7, 2009

HOMEMADE FLOUR TORTILLAS

This was my first attempt at homemade flour tortillas and I was "stunned and amazed" at how easy they were!! Since there is just two of us at home these days, I have wasted a ton of money on commercial tortillas that never get used. I buy a package of 12...use three or four and put the rest in the freezer. I don't know how many partial bags of ice crusted tortillas I've thrown away over the years, but not any more!! Fresh tortillas are so much tastier than commercial ones.

While this recipe makes about eight 8" tortillas, it is also a wonderful convenience not to be stuck with "one size fits all" tortillas. For example, you could make half full size tortillas and half "toddler size" tortillas. I think the little ones would get a kick out of that.

This recipe produces a dough that is very easy to work (feels almost like Play Doh) and it fries up in either a dry pan (if you are watching calories) or in vegetable oil if you are looking for a nice and flaky tortilla. Hubby gave the flaky style both thumbs up!!

4 cups all purpose flour
1 teaspoon salt
2 teaspoons baking powder
2 tablespoons cold shortening (or bacon grease)
1½ cups hot water
Put first 4 ingredients in the food processor and pulse until well mixed. Add hot water while machine is running. Turn machine off when dough comes together. Remove dough and knead about half a dozen times or until the dough becomes smooth and elastic. Wrap it in plastic wrap and let it sit for about 15 minutes.
After 15 minutes, turn dough out onto lightly floured counter and roll into balls about the size of a small golf ball. Roll out tortillas (starting in center and rolling outwards, turning often).
To cook the tortillas, the recipe says to use a cast iron skillet, but I found it hard to regulate the temperature (it got too hot) so I used an electric skillet instead. I'm sure with practise, the cast iron skillet would be the way to go. I fried the ones I wanted to eat in a dry skillet, but to get the big flaky bubbles, fry them in a little vegetable oil. Keep the tortillas warm in a kitchen towel while you cook the others.
NOTE: I made a half recipe for just hubby and myself and it gave me five nice big tortillas. It is such a great dough, I'm sure you could double the ingredients as well if you are cooking for a crowd.

Thursday, September 17, 2009

VEGGIE CALZONES

Lately I've been making calzones. They are a very versatile "hot sandwich" and since they require small amounts of filling...they are a good way to us any leftovers on hand. Hubby loves big meat sandwiches, so I've made them with leftover BBQ chicken, steak & cheese, ham & cheese, crisp bacon & cheese and yes, pizza goodies.

Personally, I like my calzones stuffed to the brim with veggies and a little pizza sauce & cheese. I have found, through trial and error, that you have to saute your veggies until tender then drain them well on a paper towel. If you don't, you will get a soggy-bottom crust on your sandwich. Any veggies will work. Roasted veggies are excellent, so are grilled veggies. Tonight I was lazy, so I just sauteed some broccoli, mushrooms, garlic, green onions and kidney beans, but usually, the more veggie variety the better.

I use my regular bread dough recipe (CLICK HERE) and jazz it up with 1/2 teaspoon black pepper, 1 teaspoon onion powder and 1/2 teaspoon garlic powder(add seasonings when you add the liquid in the recipe).

Normally, I would rather cut my arm off than show anyone my oven, but I wanted you to see MY secret for getting a pizzeria style pizza crust. It doesn't look like anything special, but it is truly the best way to cook pizza at home.
My hubby came up with this idea about 10 years ago when I was complaining that my pizza stone wasn't working the way I wanted it to (I wanted a crispy crust with nice pillowy edges). He cut a 1/4" thick piece of steel (to fit my oven) and I seasoned it like a cast iron frying pan. After you have seasoned it, you never grease it or wash it again, just wipe it off.....nothing sticks to it.
I preheat my oven (and the steel sheet) to 450 degrees and use cornmeal on my pizza peal so that the prepared pizza (or calzone) will slide off directly onto this sheet of hot steel (no pan). Bake for 8 minutes, then switch the heat to broil and (watching it carefully) let it broil for about 2 more minutes or until it is the color you want. It works great...no more doughy "steamed" crusts.

For calzones, you will need a ball of yeast dough about the size of a hardball. Roll it out to a nice thin circle. Place a mound of sauteed, and drained, veggies on one side of the circle and top them with 1/4 cup of pizza sauce (CLICK HERE FOR MY PIZZA SAUCE) and a serious hand full of grated mozzarella cheese. Fold the "empty" side of the calzone over the filling and pinch the edges together. Once pinched together, roll the pinched dough edge back onto itself to form a very tight seal. Using scissors, snip several vent holes in the top of the calzone. Bake at 450 for 8-10 minutes or until nice and golden. Just as soon as they come out of the oven, brush them with butter and sprinkle with parmesan and coarse salt.
VEGGIE CALZONE CUT IN HALF

Monday, September 7, 2009

PITA BREAD

Pita bread made with a bread machine, what could be easier? The only trick is to roll them thin enough (I didn't roll my my first batch thin enough and they were lofty little pillows, but bad minimal pockets). The thinner batch made perfect pocket pitas.

This was a quick fun project and the final results were delicious, you will never be happy with grocery store pita's again.


1 and 1/8 cups warm water
3 cups all purpose flour
1 teaspoon salt
1 tablespoon vegetable oil
2 teaspoons white sugar
2 teaspoons active dry yeast

Put everything into the bread pan of your bread machine, select dough setting and start. Let dough going through first rise.

Turn dough out onto your floured counter. Knead dough a few times then divide into 8 equal pieces and roll each piece into a ball. With a floured rolling pin, roll each ball out into a 6" circle (dough will be very thin). Lay circles on lightly floured surface and cover with a dry light-weight dish towel. Let it rest for 30 minutes or until slightly puffy.

In the meantime, heat your oven to 500 (yep! 500) and place a wire cake rack into your oven (set it right on the oven rack...no pan please). Gently lift a circle of dough and gently place it on the hot cake rack (bake 2 at a time). Bake for five minutes until they are super-puffed and lightly brown. Remove with spatula and place in a brown paper bag (I just used some lunch bags) and make sure you seal up the bag well (I used a chip clip to seal bags) and let the pita's cool in there. I don't know why this step is necessary, but that is what the recipe calls for. They will look like this:
When they are cooled, you can split them open or cut off one end. We really enjoyed these and I will definitely make these again.


NOTE: I don't have a bread machine, so I just made the dough in my stand mixer and let it rise for about an hour.
NOTE: Alaska has almost non-stop daylight in the summers which accounts for the huge vegetables people grow here, especially the cole crops.

Thursday, August 13, 2009

BASIC HONEY-WHOLE WHEAT BREAD

I know a lot of you are still in the throes of summer heat, however, here in Alaska, mid-August is the beginning of our fall, with night time temperatures in the 40's and day time temperatures between 55 and 65 (we will probably have night time frost in a couple of weeks). Therefore, my thoughts are turning to heartier recipes. If YOUR part of the world is still too hot for baking, I hope that you will bookmark this recipe for YOUR fall season.

I searched long and hard for this whole wheat bread recipe. It makes great dinner rolls, hamburger buns and (best of all) excellent sandwich bread. It is just a basic whole wheat recipe, nothing fancy, but the bread is moist, flavorful and remains fresh longer than most homemade breads. I hope you will try it.

3 CUPS WARM WATER
2 ENVELOPES OF YEAST (or 2 tablespoons)
2/3 CUP HONEY
5 CUPS BREAD FLOUR
3 TABLESPOONS CANOLA OIL
1 TABLESPOON SALT (do not leave out)
3 & 1 /2 CUPS WHOLE WHEAT FLOUR

In your stand mixer bowl, mix the warm water, honey, oil, salt, yeast and 5 cups of bread flour. Mix well and let this stand for 30 minutes (it will get full of air bubbles).

After 30 minutes, mix in 2 cups of whole wheat flour (you'll need your dough hook for this). Work in an additional 1 & 1/2 cups of whole wheat flour (1/2 cup at a time) until your dough comes cleanly away from the inside walls of your bowl. This last measurement of flour is flexible. You may only need one more cup or you may need 2 cups, it depends on the humidity in your house (and the moisture level in your flour).

You will know your dough is ready when the inside walls of your mixing bowl are free of anything sticky. When it gets to that stage, let the machine knead the dough for about five more minutes.

After it has kneaded for five minutes, remove the dough from the bowl and spray just a little vegetable spray inside the bowl and put the dough back in. Cover with plastic wrap and let it rise for about an hour or until the dough has doubled.

After it has doubled, push your fist into the dough and deflate it. Turn it out onto the counter and knead it about half a dozen times to get the air out. If you are making sandwich bread, divide the dough into three sections (recipe makes three loaves).

Roll each section out into a rectangle then roll each rectangle up into a log, pinching the seams and ends shut. Place each "log" into a greased 9"x5" loaf pan. Cover loosely with plastic wrap and let the dough raise for an hour or until doubled.

Bake loaves in preheated 400 degree oven for 25 minutes. Immediately remove from pan and cool on bakers rack. Brush loaf tops with butter. Don't cut the loaves until they are cooled completely.

If you want to make hamburger buns, pinch off a ball of dough about the size of a lime (maybe just a little bigger). Round it into a ball and then put it on your counter and flatten it to a 5" circle with your hand. Place on greased cooking sheet and cover loosely with plastic wrap. Let it raise for about 30 minutes or until doubled. Bake at 400 for 15 minutes or till golden.

If you are making bread rolls, pinch off a piece of dough about the size of a golf ball. Round it and place it in a greased baking dish about 2" apart. The dough will expand and touch each other as they raise. Cover with plastic and let raise for an hour or until doubled. Bake at 400 for about 18 minutes or till golden.

NOTE: Just before you cover your dough (at any stage) with plastic wrap, use a minimal amount of cooking spray on the surface of your dough. This will keep the plastic from sticking (and deforming) your dough when you try to remove it.
NOTE: As soon as the bread comes out of the oven, make sure you brush the tops with a little melted butter. This will keep the crust soft.
NOTE: Make hamburger buns a lot thinner than you think they need to be. Don't forget, they will raise even more in the oven and you don't want a bun that looks like a football.
NOTE: Let bread loafs cool completely before you slice them. If you try to slice hot bread, it often misshapes the slices.

Tuesday, July 21, 2009

HOT SOFT PRETZELS

I love hot pretzels, especially nice big puffy ones. This recipe is not hard at all, but it does have a few pesky steps. The pretzels are deliciously chewy on the outside and soft and fluffy on the inside and you can top them with just about any seed or seasoning you prefer. I made these with toasted sesame seeds and a light sprinkle of coarse ground salt. This recipe makes 8 large pretzels.


1 & 1/2 cups warm water
1 tablespoon white sugar
2 teaspoons kosher salt
1 generous tablespoon of dry yeast
4 cups all purpose flour (divided)
2 tablespoons canola oil


In your stand mixer, mix two cups of the flour, sugar, yeast and kosher salt. Pour the warm water and oil over the top and mix with wooden spoon until all ingredients are wet. Let this stand for about 10 minutes.


Attach the dough hook to your mixer and gradually beat in the additional 2 cups of flour (1/2 cup at a time). If dough is still sticky after you get the 4 cups of flour mixed in, had a little more flour (tablespoon at a time) until the dough pulls cleanly away from the inside walls of your mixing bowl. Once it does that, knead on low for about five minutes (see note).


Remove the dough from your mixing bowl and spray the inside of the bowl with vegetable spray; return the dough to the bowl and spritz the top of the dough with vegetable spray; cover the bowl with plastic wrap and let dough sit for an hour or until it doubles in size.


Preheat your oven to 450. Line two large baking sheets with parchment paper and spritz the paper with vegetable spray then rub a paper towel over the parchment paper to remove excess spray. Set aside.


Punch down the dough and cut it into 8 pieces. Roll out each piece into a 24" rope and twist it into a pretzel shape (pinching ends together tightly). Place pretzels on the prepared parchment paper.


In a large (wide bottomed sauce pan), bring 10 cups of water + 2/3 cup baking soda to a rolling boil (it will really bubble). Gently place one of your pretzels onto a slotted FLAT spatula and gently lower the spatula (with pretzel) into the boiling water. Shake the spatula very gently and the pretzel will float off into the water. COOK ONLY ONE PRETZEL AT A TIME.


Boil each pretzel for 30 seconds then gently lift it back out of the water and (before you put it BACK on the parchment paper) rest the slotted spatula/pretzel gently on a kitchen towel (for a couple of seconds) so that it will absorb any water drips......THEN put it back on the parchment paper. Repeat this process for each pretzel.


When all pretzels have been through the water bath, gently brush the tops of them with egg wash (1 egg yolk beaten with 1 tablespoon water) and sprinkle with salt and/or seeds.


Bake in 450 oven for 12 minutes or until they are dark golden brown. Cool on a wire rack for five minutes before serving.
Not the best for you, I'm sure, but the cheese dip recipe that is on the back of the Velveeta box is still my favorite: 1 pound of Velveeta (cubed) + 8 ounce jar of your favorite salsa. Mix and microwave on high until cheese is really melted (about 4 or 5 minutes...stir once in a while). When it's completely melted, add 2 tablespoons chopped cilantro. Yum!

This evening, hubby had sweet chicken wings for dinner (not my favorite) so I sliced one of the big pretzels and made an egg salad sandwich with it. Oh man, what a sandwich!

NOTE: I have not tried it, but I do not see why the initial dough mixing and kneading couldn't be done with a bread machine.
NOTE: Be very gentle with the pretzels when you transfer them from the boiling water back to the parchment paper lined baking sheet.

Search This Blog

Popular Posts

Like This

 
Copyright © 2011. Area Information: BREAD RECIPES . All Rights Reserved
Company Info | Contact Us | Privacy policy | Term of use | Widget | Advertise with Us | Site map
Template modify by Creating Website. Inspired from CBS News